Migration
What to keep in mind
-
During migration, users can continue working on the Exchange Server as usual — there’s no interruption.
-
The tool automatically tracks previously migrated data, allowing you to rerun migrations without creating duplicates.
-
All transferred data remains fully secured.
-
Administrators can exclude outdated or unused mailboxes to make the migration cleaner and faster.
-
Migration can be performed from or to any IceWarp Server, whether hosted externally or within your internal network.
-
Although the tool runs on Windows, it can migrate data to IceWarp Servers running on either Windows or Linux.
-
For optimal performance, we recommend migrating users in batches of up to 700.
Starting the Migration Process
This Windows-based utility requires no installation — simply open the executable file to start. When launched, the first screen displayed is Initial Info.
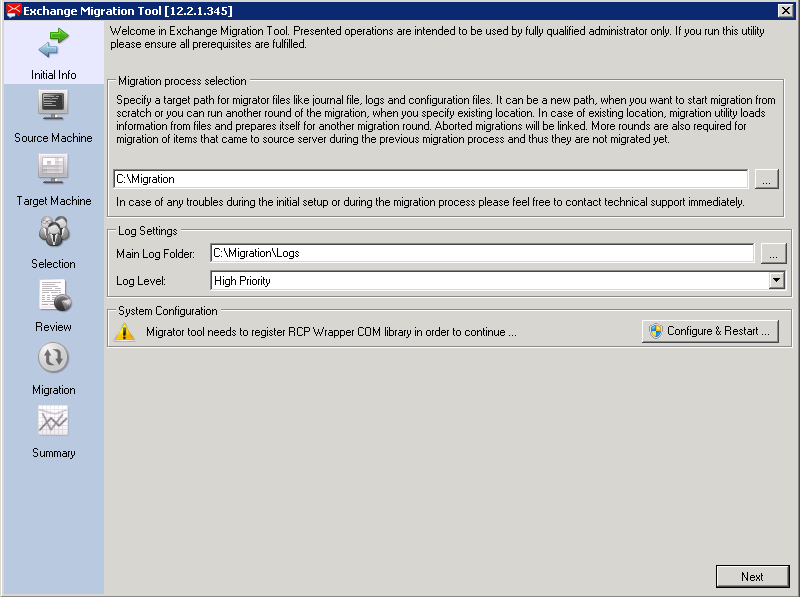

Figure 2a. System Configuration prompt requesting registration of the RCP Wrapper COM library.
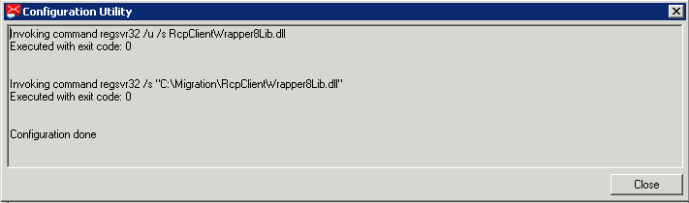
Figure 2b. Confirmation window showing successful registration of required components.
Step 1: Prepare log Settings
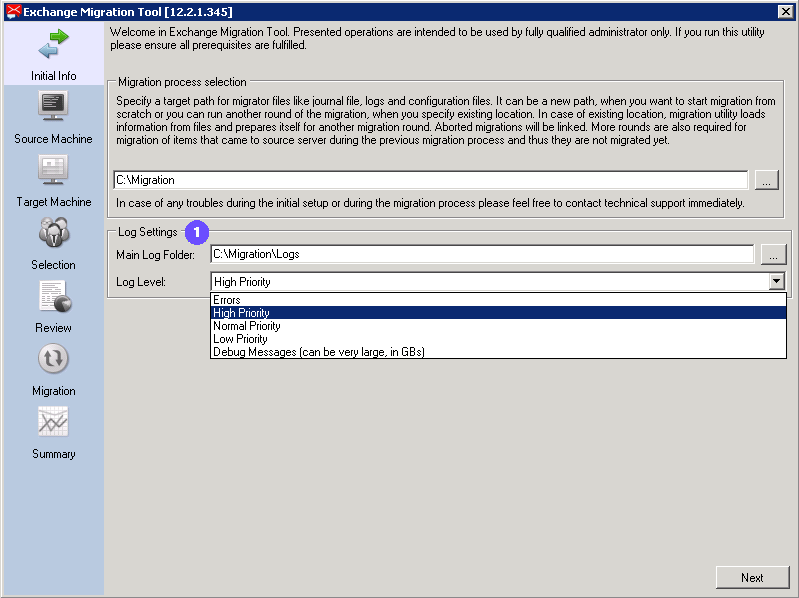
 Log Settings:
-
Main Log Folder – Keep the default location; the logs will remain in the migration folder.
-
Log Level – Set to High Priority to ensure all critical migration events are captured.
Step 2: Specify Source Machine
Specify here the parameters controlling the source machine.
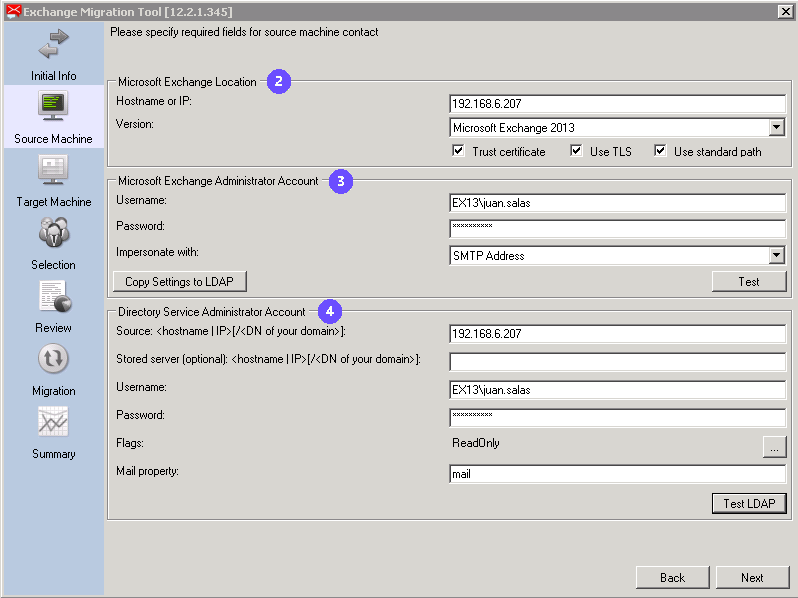
Enter the data into specific fields as instructed below.
 Microsoft Exchange Location:
-
Hostname or IP – Enter IP or hostname of Exchange Server
Version – Select proper Exchange Server version. The supported versions are:
-
Microsoft Exchange 2007 (SP1)
-
Microsoft Exchange 2010
-
Microsoft Exchange 2010 (SP1)
-
Microsoft Exchange 2010 (SP2)
-
Microsoft Exchange 2013
-
Microsoft Exchange 2016
-
Microsoft Exchange 2019
-
Trust certificate – Leave checked
-
Use TLS – Leave checked
-
Use standard path – Leave checked
 Microsoft Exchange Administrator Account
You need to provide a special admin account that has permission to act on behalf of (or “impersonate”) all the users you want to migrate.
Enter the data into specific fields as instructed below.
-
User name & Password – Enter the credentials of the account that will impersonate all users in the batch, allowing the Exchange Migrator to process mailboxes accordingly.
-
Impersonate with – Select the field that impersonation will be based on (for example, SMTP address).
-
Copy settings to LDAP button – Use this option if Active Directory and Exchange share the same configuration.
-
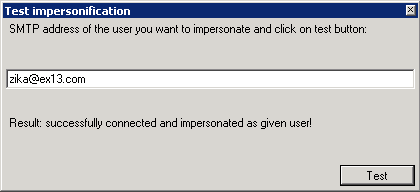
Test button – Tests the impersonation setup using an email address. When clicking the Test button, enter account with appropriate permissions.
 Directory Service Administrator Account
Enter the data into specific fields as instructed below.
-
Directory service hostname or IP (source) – Enter the IP address or hostname of your AD or LDAP server.
-
Stored server hostname or IP – Leave this field empty (do not use).
-
Directory service username – Enter the AD/LDAP administrator username.
-
Directory service password – Enter the corresponding AD/LDAP administrator password.
-
Flags – Do not modify this setting.
-
Mail property – Select the field that defines the user’s email address.
-
Test LDAP button – Click to verify the LDAP connection. Pressing the Test LDAP button will return a result as shown:
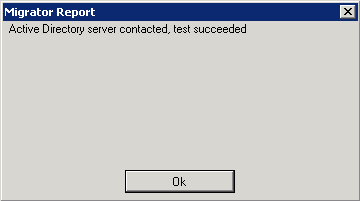
Once you're ready and the LDAP test was successful, proceed with Next.
Step 3: Specify Target Machine
Specify here the parameters controlling the target machine. (IceWarp Server)
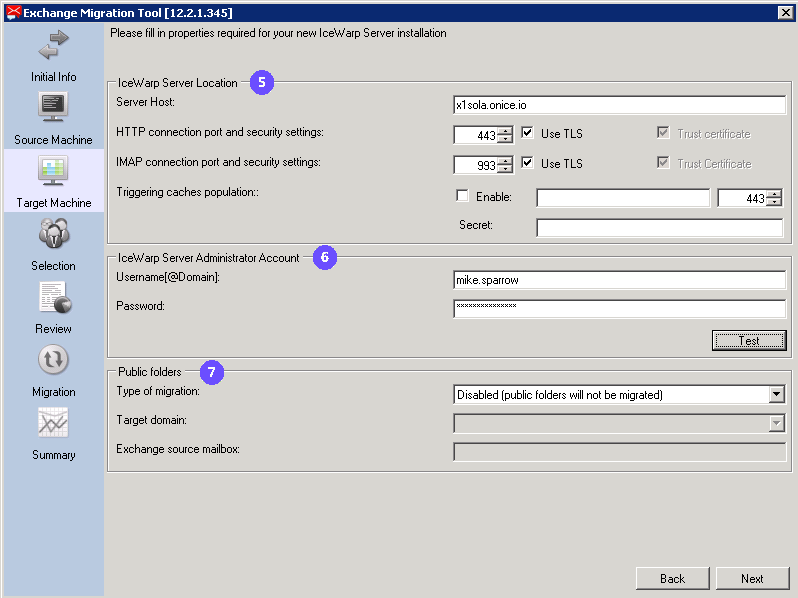
 IceWarp Server location
Enter the data into specific fields as instructed below.
-
Server host – Enter the IP address or hostname of the target IceWarp Server.
-
HTTP port – Specify the HTTP or HTTPS port used for the web service connection.
-
IMAP port – Enter the IMAP port number for mailbox access.
-
Use TLS – Select this option to secure both HTTP and IMAP connections.
-
Trust certificate – Ensure this box is checked to confirm certificate validity.
-
Triggering caches population – Leave unchecked; not applicable for this migration scenario.
 IceWarp Server Administrator Account
Provide login details for an administrator account on the IceWarp server (not in Exchange Server).
-
Administrator username – Enter the destination IceWarp username.
-
Administrator password – Enter the destination IceWarp password.
-
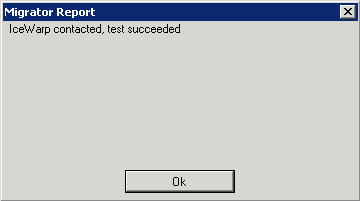
Test button – Click to test the IceWarp connection. Pressing the Test button will return a result as shown:
 Public folders
Enter the data into specific fields as instructed below.
-
Type of migration – Disabled (public folders will not be migrated)
-
Target domain – N/A
-
Exchange source mailbox – N/A
Once you're ready and the Test was successful, proceed with Next.
Step 4: Selection
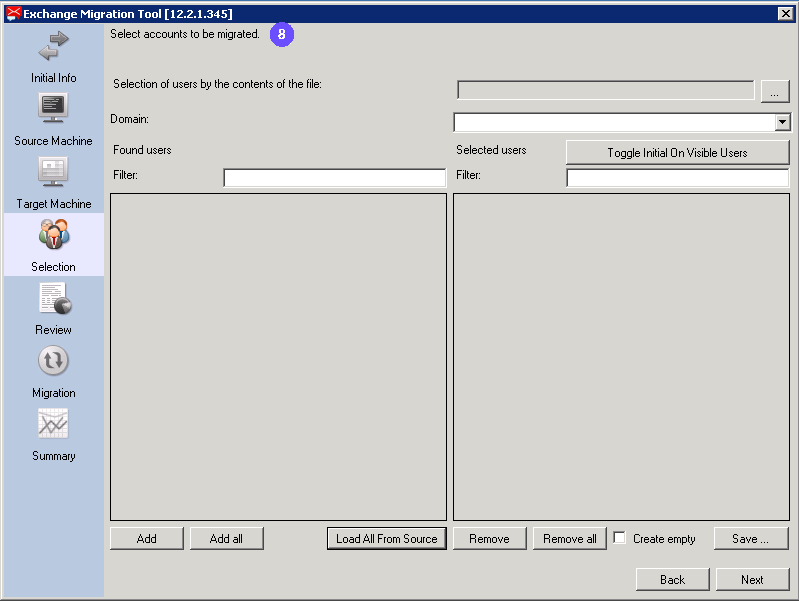
 Selection of accounts for migration
Once the Exchange Migrator connects to Active Directory, there are two possible scenarios that determine how the initial migration begins, depending on how user accounts are selected for migration:
Users already exist in IceWarp
In this case, the initial migration doesn't apply. Instead, you have two options for selecting users:
-
Load All From Source- Loads all records that match the domain directly from Active Directory.
Not recommended for large Active Directory environments, as it can significantly slow down performance. Use this option only for small batches of users.
-
Selection of users by the contents of the file – Upload a
.txtfile containing a list of user records (one email address per line).
Users do not yet exist in IceWarp
-
The initial migration applies to new users. The Initial checkboxes mark the accounts to be created on the target server (IceWarp).
-
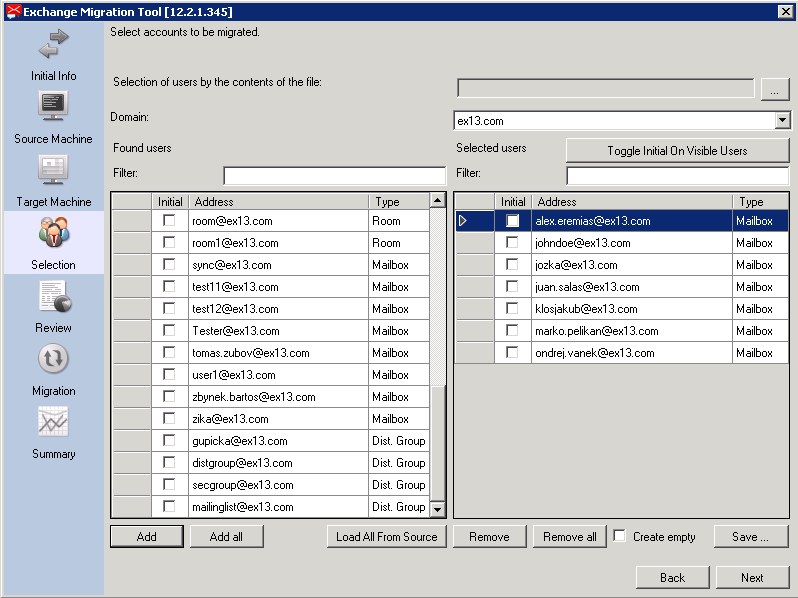
After the user list is loaded, all accounts will appear on the left panel for manual selection.
Transfer records individually to the right panel using Add, or click Add All to move all users at once..
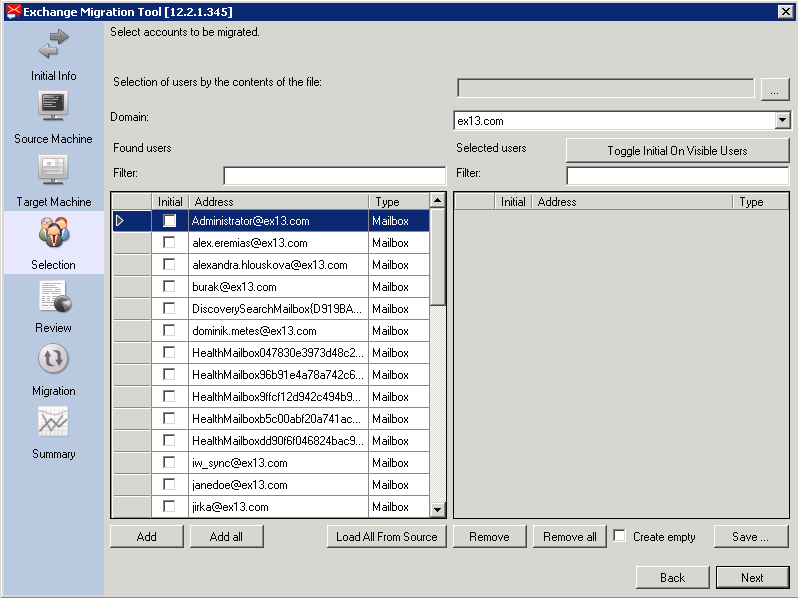
 Domain selection

Summary of options
-
Selection of users by the contents of the file –Upload a .txt file containing one record per line. Multiple domains can be included in the same file.
-
Domain – Select the domain to manage. To migrate users from multiple domains, select each domain individually and add users using the Add or Add All button.
-
Filter – Use the filter field to quickly locate specific users.
-
Toggle Initial On Visible Users – Enables all visible checkboxes for initial migration. Use this when performing the first migration (no users exist on the target machine).
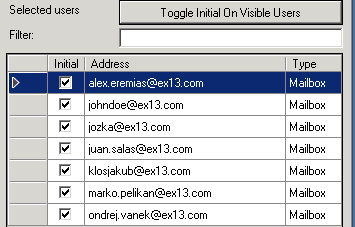
Figure 13. Using the Toggle Initial On Visible Users option to select all visible users for initial migration.
-
Initial checkbox – Identifies users and domains that should be created on the target server.
-
Add – Adds the selected user(s) to the migration list.
-
Add All – Adds all available users to the migration list.
-
Load All from Source –Retrieves all users from Active Directory or LDAP. This process may take several hours; recommended only for smaller batches (fewer than 200 users).
-
Remove – Removes selected users from the migration list.
-
Remove all – Removes all users from the migration list.
-
Create empty – Leave unchecked.
-
Save –Saves the current configuration of this page for future use.
Incremental (delta) migration
When performing incremental (delta) migration, only users that are still present in Active Directory will be available for selection. Users who were not provided by Active Directory during the last migration (for example, inactive or removed accounts) will not appear in the selection list and will not be migrated.
Once all users are selected and ready, proceed with Next to continue.
Step 5: Review
Verify that all users are selected correctly and configure the migration options..
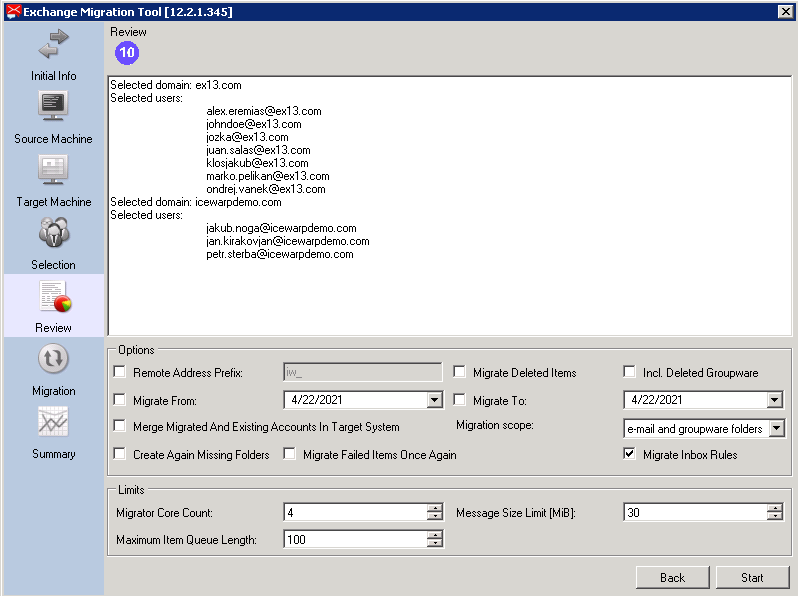
 Review: options and limits
The parameters available in this section may vary depending on the migration scenario. Review the following options carefully before proceeding:
-
Remote address prefix – Used only in hybrid migration scenarios. Skip this option unless explicitly required.
-
Migrate Deleted Items – Leave unchecked.
-
Incl. Deleted GroupWare – Leave unchecked.
-
Migrate from – Defines the start date for migration (messages and data created from this date onward).
-
Migrate to – Defines the end date for migration (messages and data created up to this date).
-
Merge migrated and existing accounts in target system – Recommended when performing migrations without the initial check or when merging existing user accounts with new data.
-
Migration scope – Specifies what data is migrated (for example, email and folders only).
-
Create Again Missing Folders – Recreates any missing folders during migration. Useful for incremental folder creation beyond default ones (Inbox, Outbox, Sent).
-
Migrate failed items once again – Reattempts to migrate items that failed due to errors or when adjusting the migration timeline (Migrate from / to).
-
Migrate Inbox Rules – Determines whether mailbox rules should be migrated. Note that not all rules may be supported.
Limits
These parameters may vary depending on the environment being used.
Migrator Core Unitt – Defines the maximum number of CPU cores allocated for migration. The more cores assigned, the faster the migration process will run. Administrators should verify the number of available CPU cores on the local machine (for example, using Task Manager) and adjust this value for optimal performance.
Message size limit – Sets the maximum message size allowed for migration. A maximum of 30 MB is recommended.
Maximum item queue length – Specifies the number of items queued for migration. A value between 100 and 200 is recommended.
Once all options are configured and the setup is ready, click Start to begin the migration. Be aware that after pressing Start, the migration will commence immediately, and it will no longer be possible to modify parameters or go back beyond this point.
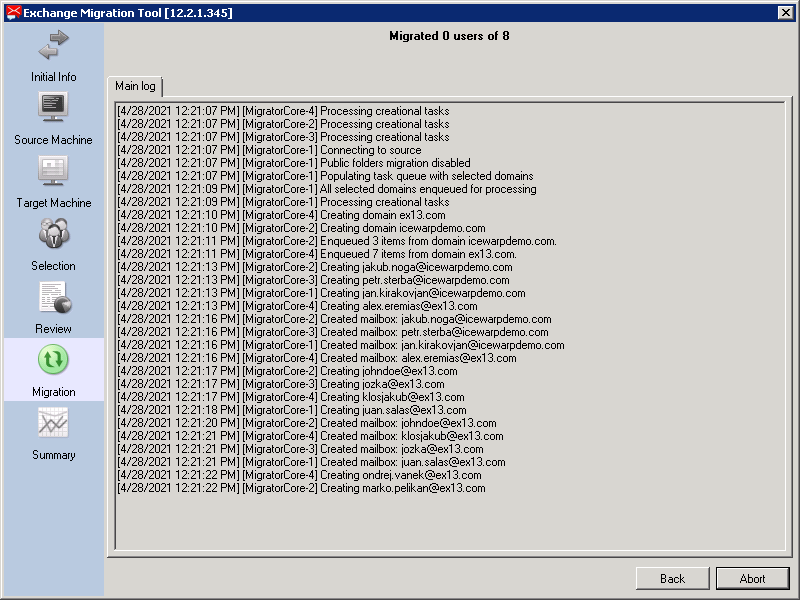
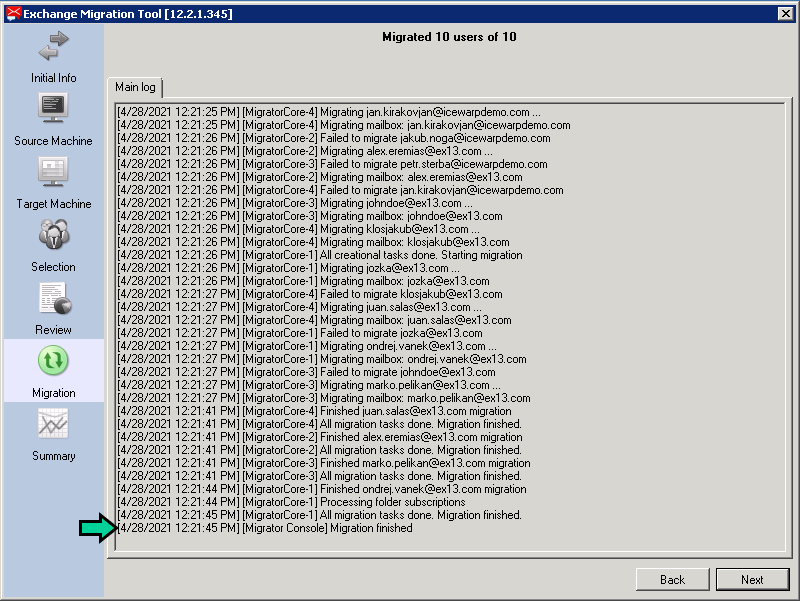
Step 6: Migration
You can monitor the migration progress in real time. The total duration depends on the amount of data and number of users being migrated. In some cases, the process may take several hours to complete.
Step 7: Summary
Review the migration summary, then click Finish to complete the process.
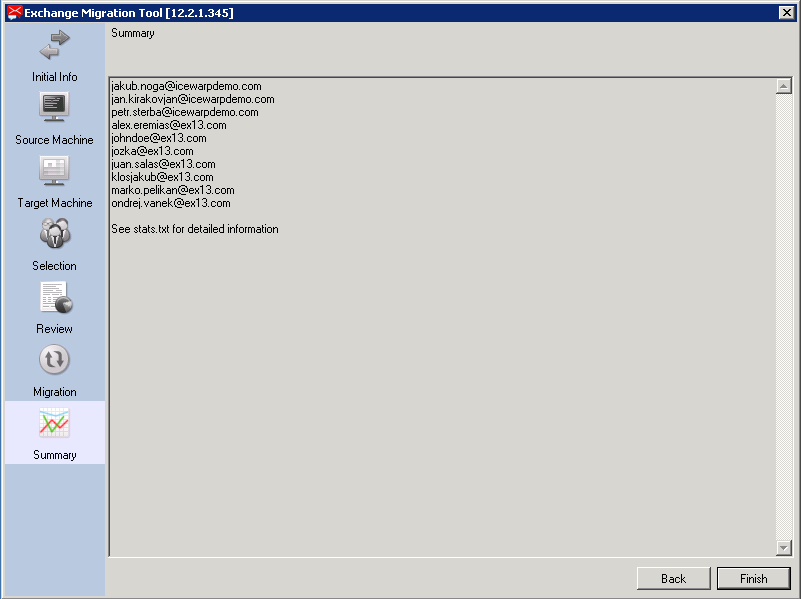
As shown in the Summary, see stats text file for detailed information.

