Send and Receive
There are several different operations you can perform in the e-mail.
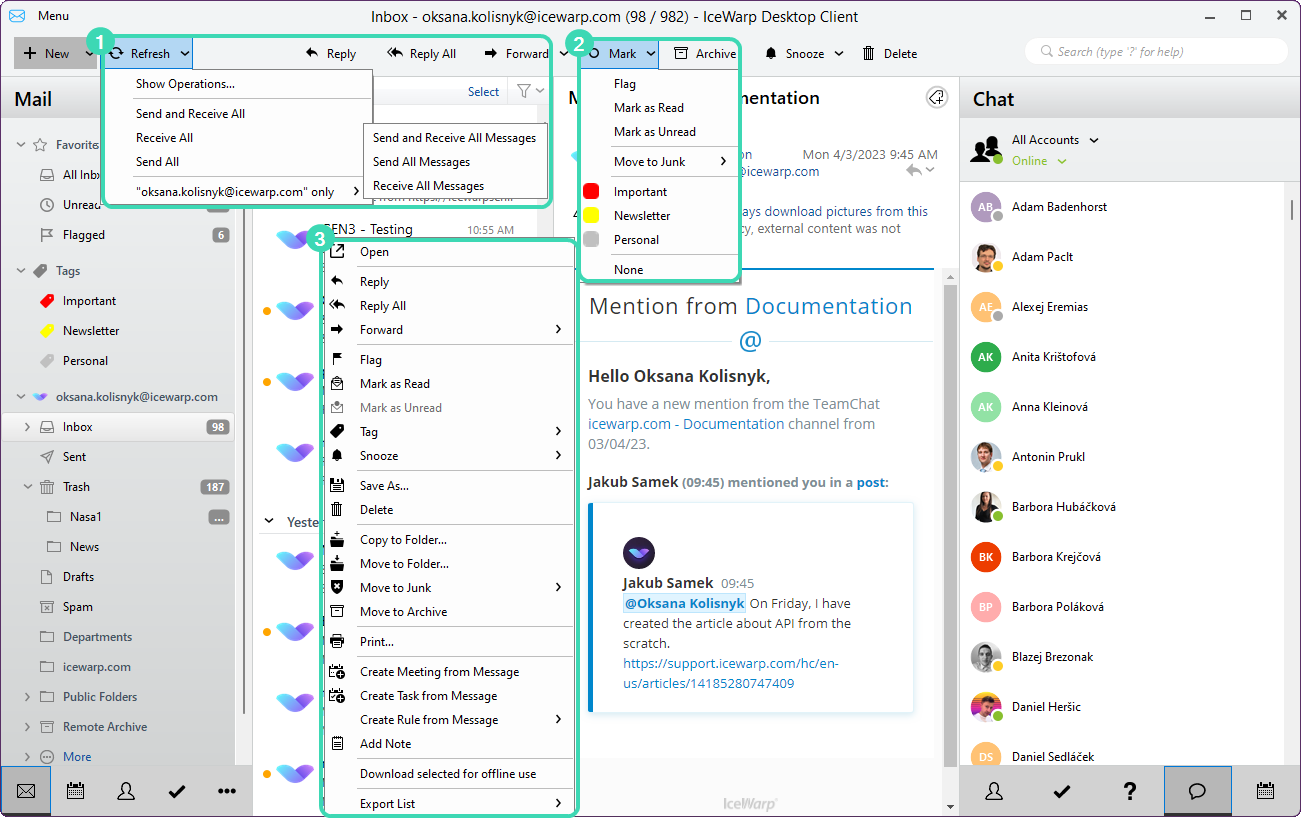
Figure. Refresh button dropdown.
Refresh 
Click Refresh to download and upload new data to all your accounts - this data can be new messages, change of Flags or Read status, etc.
Click the drop-down list to expand the options.
-
Operations: Displays the list of executed operations, returned errors and log.
-
Send and Receive All: Click this option to send all your outgoing emails and check for incoming emails at the same time.
-
Receive All: Check your email accounts for incoming emails.
Tip:You can setup a recurrent time to check for new emails under Settings - General - Synchronization
-
Send all: After you have completed writing an email, you can send it by clicking the Send button. You can also send saved emails.
-
<Email account> only: In case more than one account is set up in the IceWarp Desktop Client, it is possible to Send and receive all, Send All and Receive All messages for a specific account.
Toolbar
The toolbar provides a quick access to the most popular actions: Reply, Reply All, Forward, etc.

Figure.Toolbar.
The E-mail toolbar has following items:
-
Reply: Reply an incoming email by selecting it in the main panel and clicking Reply in the mail toolbar or select Menu - Message - Reply
-
Reply all: Reply all recipients of the original email.
-
Forward: You can forward an email by selecting it in the email list and clicking Forward in the mail toolbar or select Menu - Message -Forward
Note that you can forward the email either as Attachment or as Original. This can be selected from the drop-down menu.
Mark button 
Select how you like to mark your email from the drop-down menu.
- Flag: Mark your email manually, if you want to follow up on it in future.
-
Mark as read: Mark the unopened email manually, by Right-Clicking it and select Mark as read.
-
Mark as unread: Mark an already opened email as Unread (to remind yourself to read it more carefully later) by Right-Clicking it and selecting Mark as unread.
-
Move to Junk: You can select from three following move options: Move to Junk, Move to Junk and blacklist email, Move to Junk and blacklist domain.
-
Move to archive: Relocates items to Archive folder.
-
Junk / NotJunk: Flag spam/legitimate email as such.
Note:It is also possible to categorize emails using tags.
Delete 
Right-click an email. Select Delete, or press Delete button on your keyboard.
Various functions are displayed when you right-click an email in your Inbox. Following menu appears, most of the functions are explained in the text above. Some are explained here:
- Copy to folder: Same as move to folder, but a copy of the selected email(s) is also kept in the original folder.
-
Move to folder: You can move your emails to another folder by Right-clicking the selected email(s) and select Move the folder.
In the mini-explorer that pops up, select an existing folder or create a new one where you want your email(s) to be moved to.
-
Save as: Saves a message locally.
-
Print: Sends an item for printing.
-
Create a Meeting from Message: Creates a new calendar entry with the sender and addressees as participants, using the email as direct reference.
-
Create Task from Message: Creates a new task entry, using the email as direct reference.
-
Export list: Allows to export item to CSV or HTML formats.

