How to use resource scheduling on planning devices
The following steps illustrate WebAdmin users with sufficient permissions to setup planning resources in Calendar events as per below workflow.
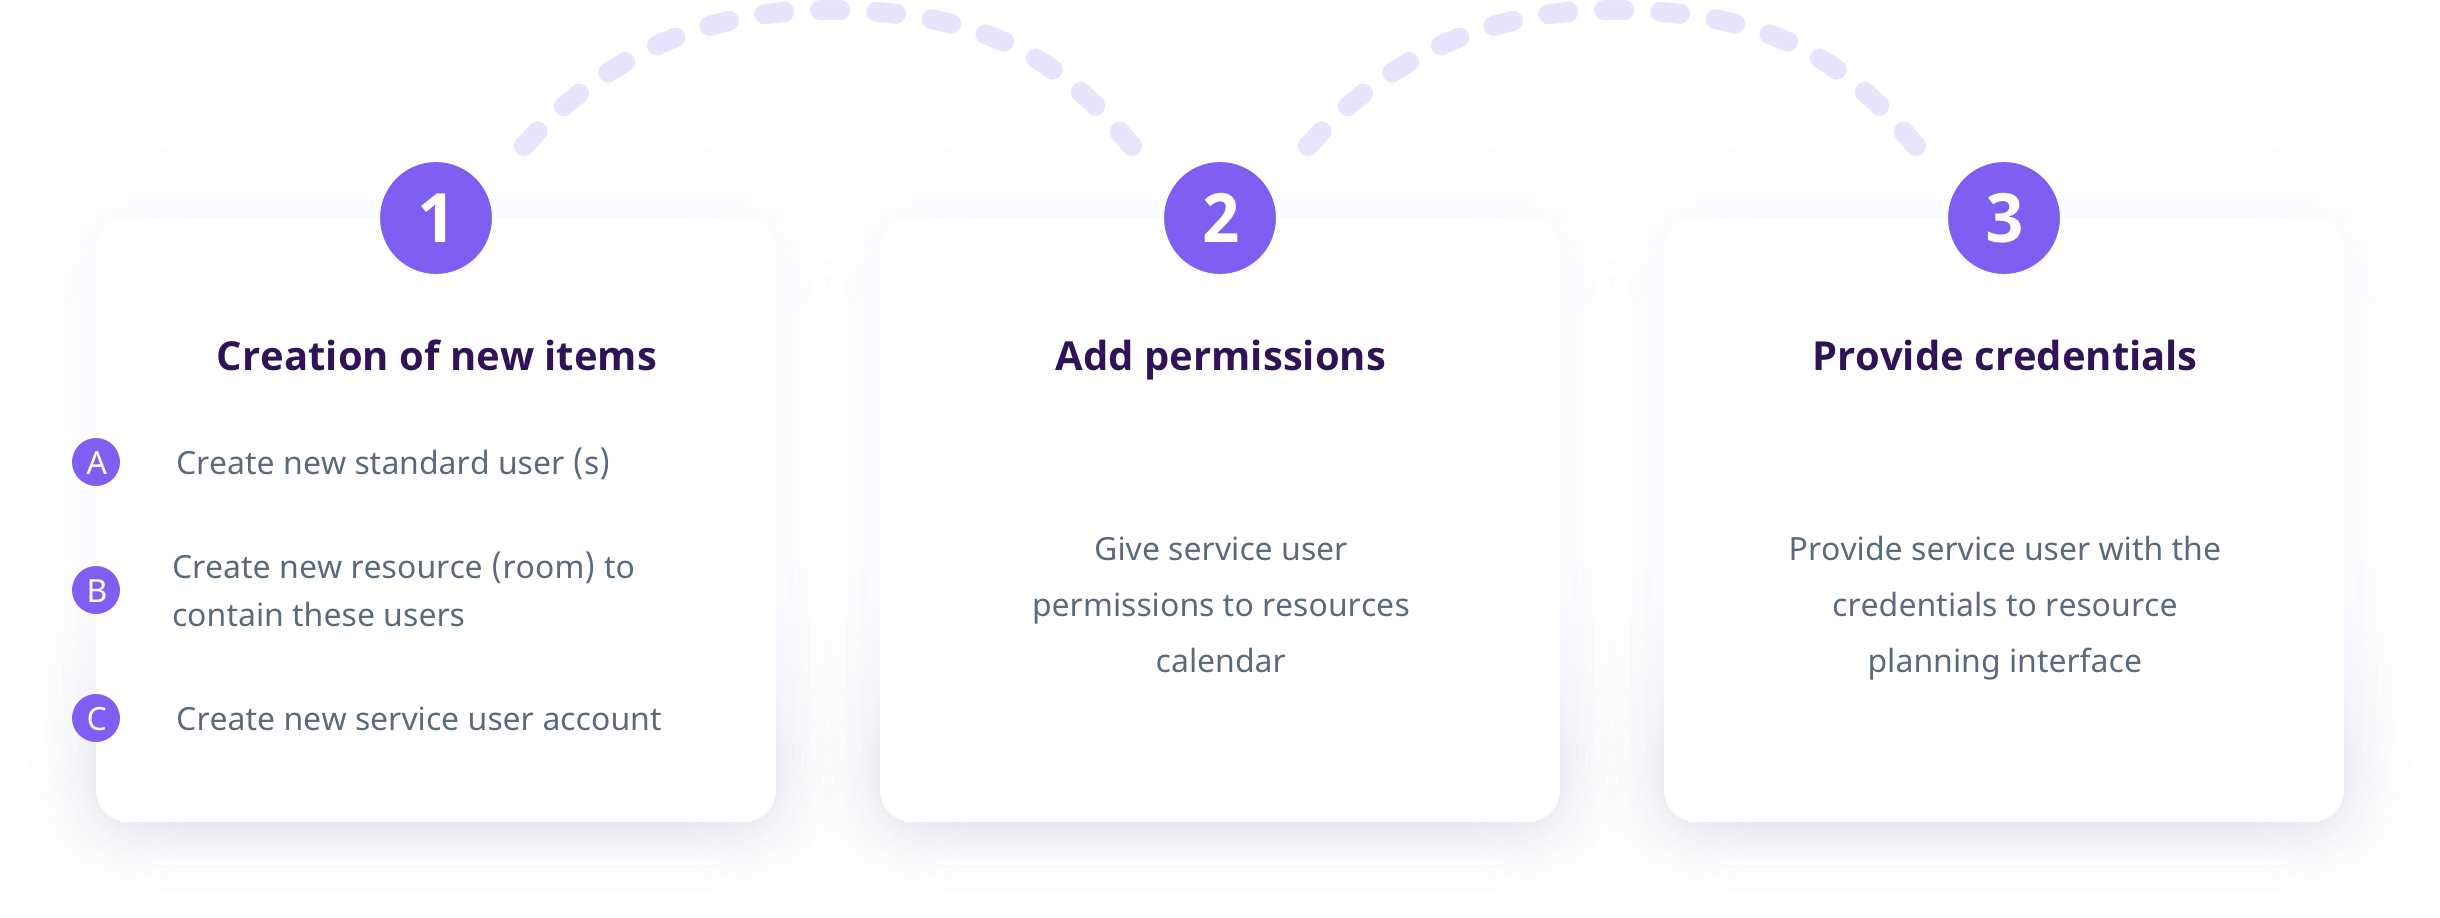
Planning resources workflow
-
Log on to WebAdmin and Create a new user (standard attendee who can schedule resources on domain)
-
Create a new resource (room), then add members created in Step 1 to allow them to schedule resource in their events.
-
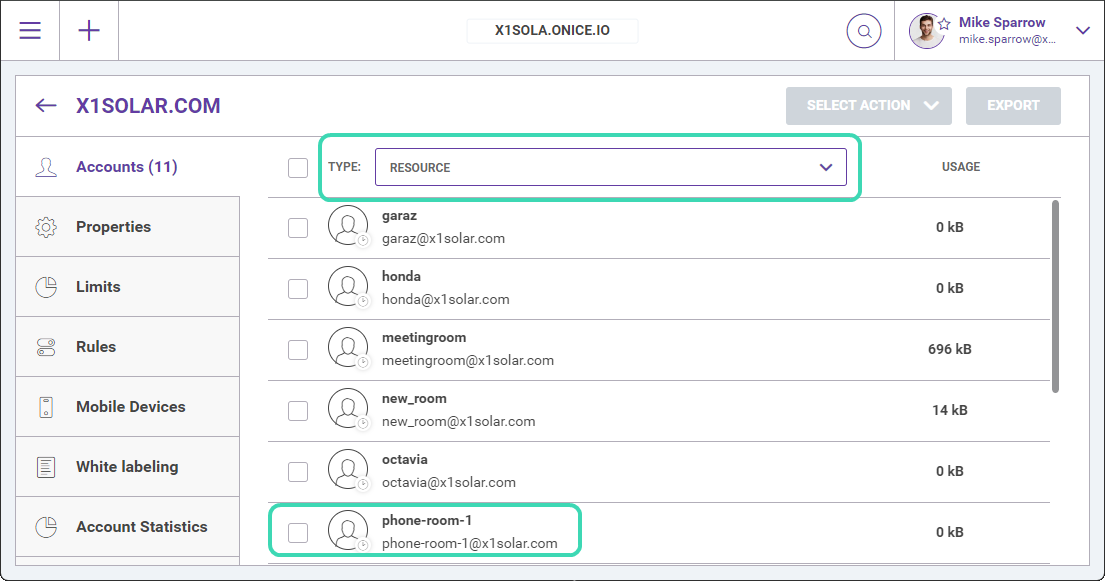
Go to Users & Domains -> click {your domain}. In Type:, select Resource. Click the room in the list.
-
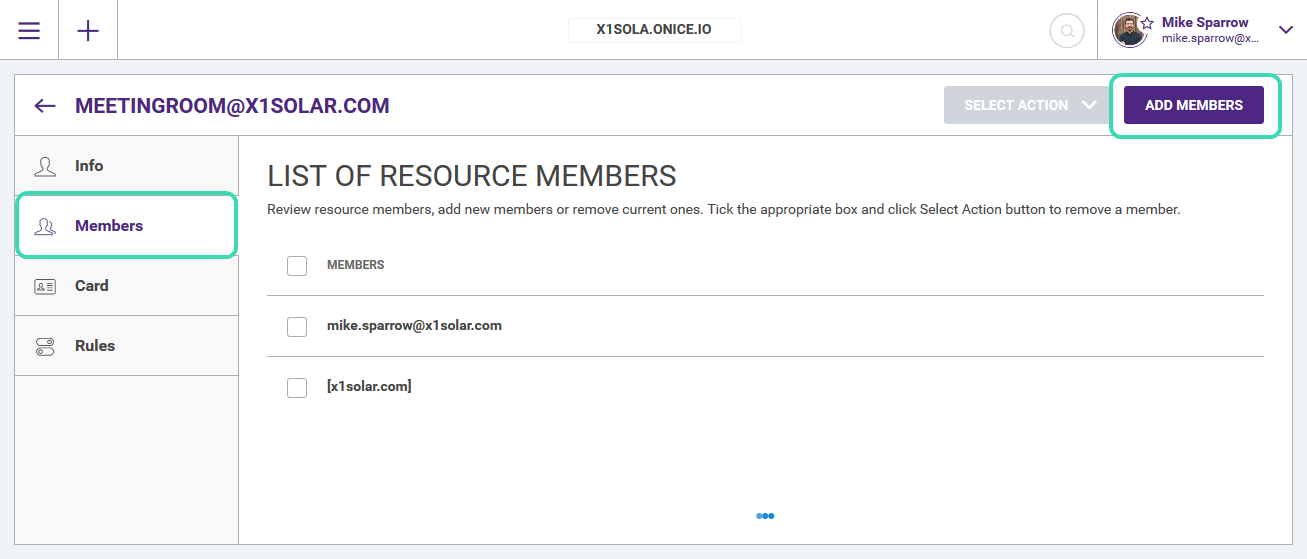
In the room window, go to Members tab and click Add Members to see the list of existing members you can add.
-
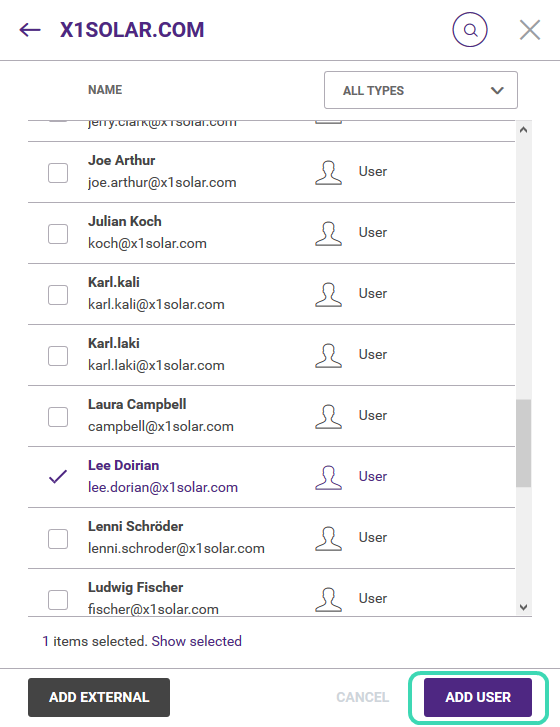
Add the members created in Step 1 that will have permission to book a meeting room. Select them from the list and click Add User.
-
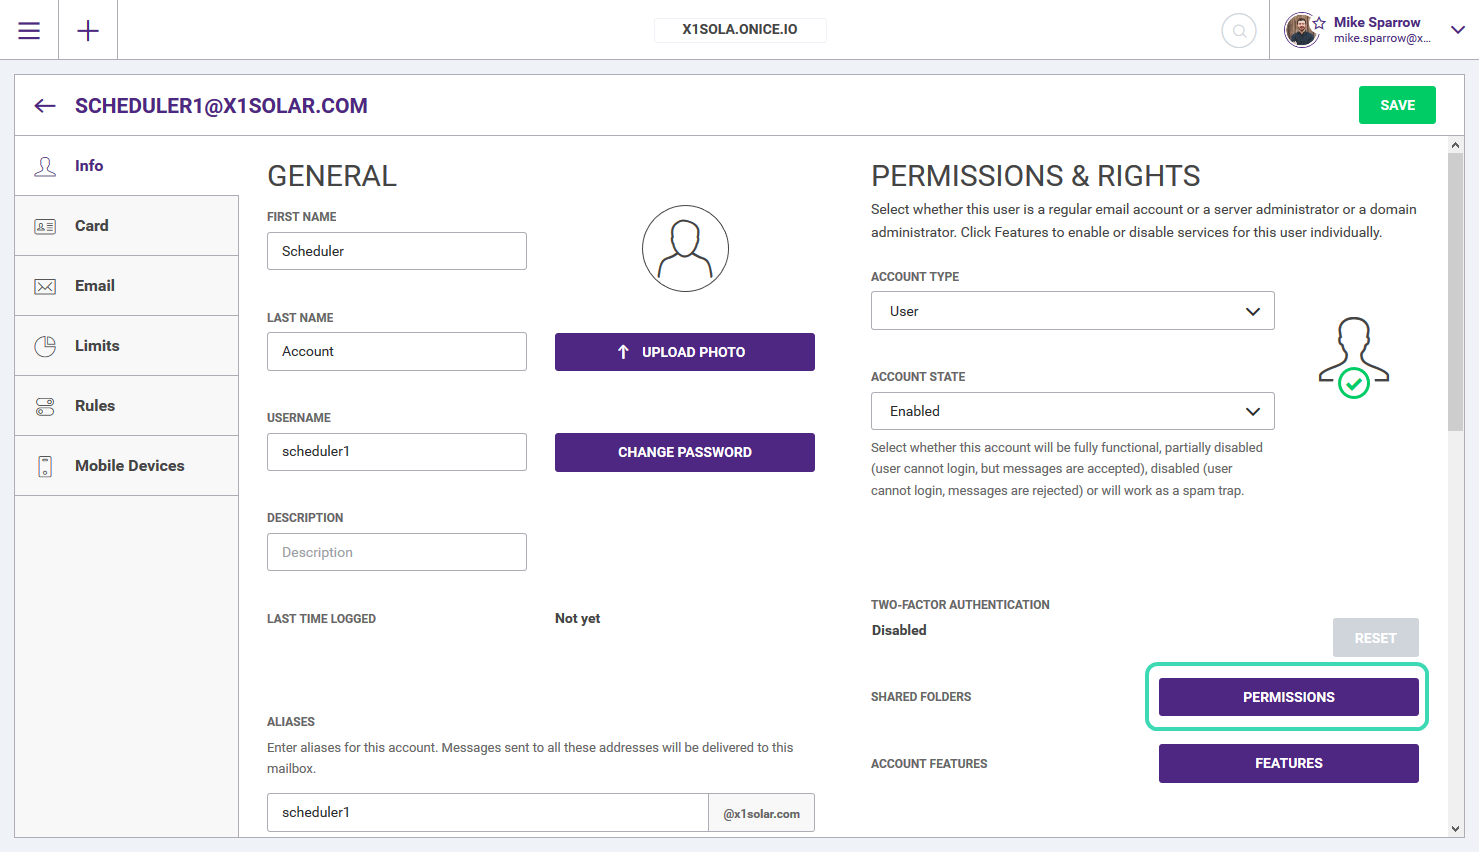
Create new user and assign it a service account where you will see all scheduled events in resource. Click Permissions to grant this account necessary permissions.
-
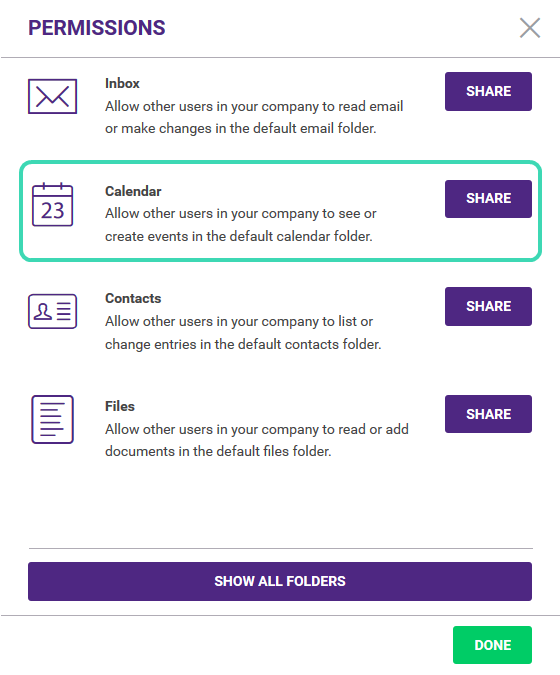
In Permissions, select Share next to Calendar.
-
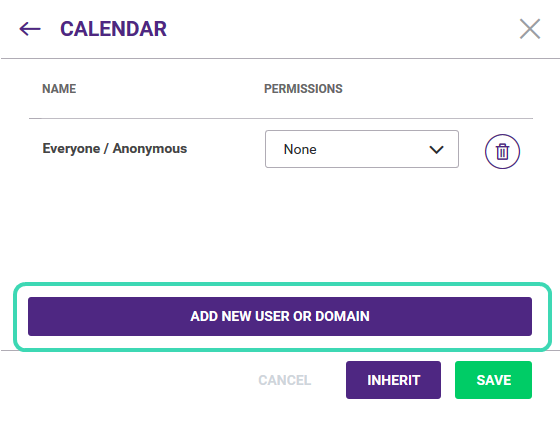
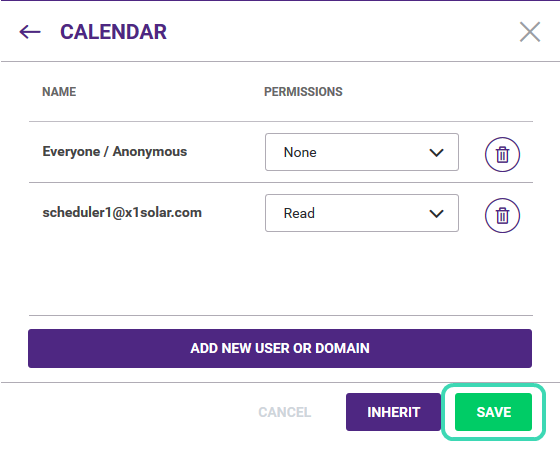
From the Calendar dialog, select Add new user or domain.
-
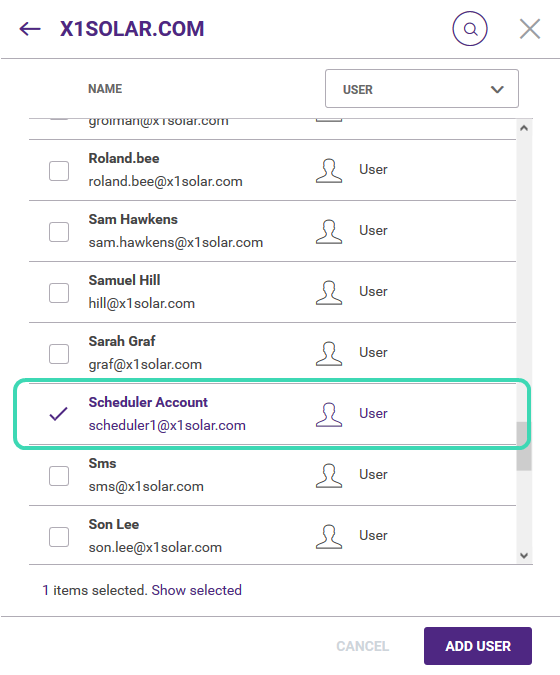
Look for the service account you have created.
-
Assign Read permissions to the account and click Save and then on the next screen, click Done.
Note: If the planning device also allows Anonymous Meetings (reservations without user login, i.e. on behalf of a service account), assign both Read and Write permissions.
-
Repeat this process for as many available meeting rooms.
Note: Use the full-email account of service account as logon on WebDAV URLs for accessing the resources calendar:
https://server.icewarp.com/calendar/

