Pre-migration
Before you can start your migration process, you need to be prepared. Make sure to follow these steps to avoid any problems.
Step 1 – Plan your migration timings
Decide on the date when you officially switch to IceWarp. Do you have a subscription? Or perhaps your license is about to expire? Make sure to migrate your data before that happens.
Migration can take lot of time. It depends on how many users and how much data you have:
| Number of Users | Estimated Migration Time |
| Up to 50 Up | Up to 1 day (24 hours) |
| 50 to 1000 | Several days, up to 1 week |
| More than 1000 | Several weeks |
Step 2 – Set up the destination environment
You can migrate your data either to your own server (on-premise) or to IceWarp Cloud:
-
For on-premise setup, you will need to have IceWarp installed. We recommend using our pre-installed image, installation on Windows, Linux, or via Docker is also supported.
-
For Cloud setup, simply create a cloud account on the IceWarp Cloud platform (see our pricing for details).
Step 3 – Setting up access to Microsoft 365
You can only migrate data from M365 if the license is still active. Once the license expires, migration is no longer possible.
Then you will need administrator access from the Microsoft Entra admin center, then you need to create a Secret, and to enable API permissions. Here is a simple, step-by-step guide on how to do tick off these three tasks.
Setting up access to Microsoft 365
1. Go to entra.microsoft.com.
2. Enter your Microsoft Account credentials to log in.
3. Go to Home > Entra ID > App registrations > All applications
4. Select + New registration.
5. Name your application.
6. Select Single tenant.
7. Select Register.
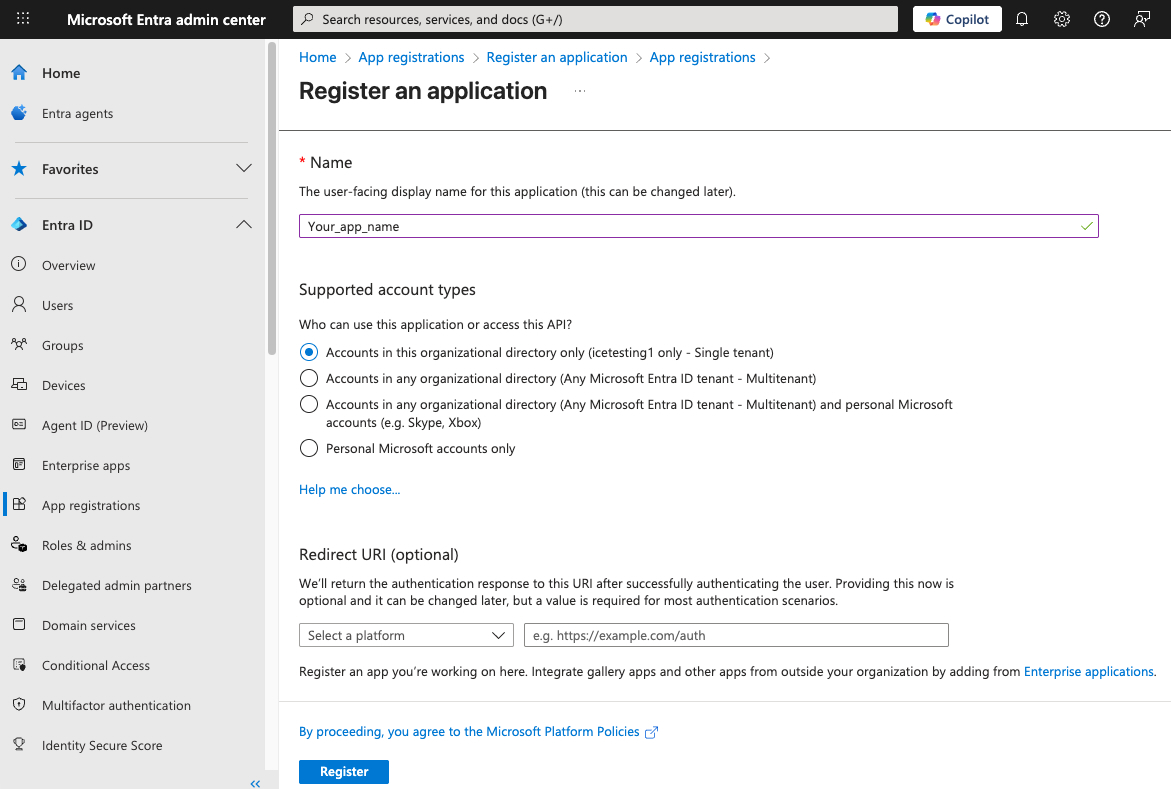
8. Copy the Directory (tenant) ID and Application (client) ID.
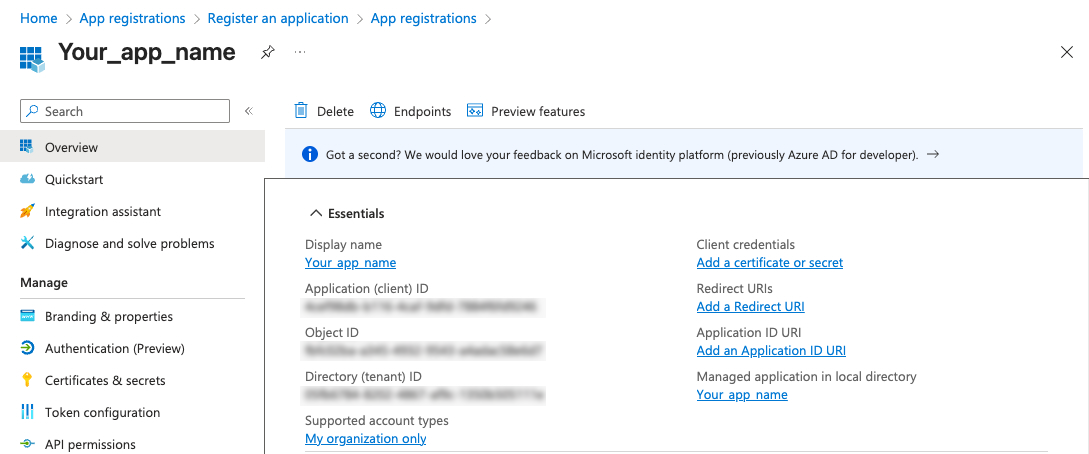
9. Paste the Directory (tenant) ID and Application (client) ID to the Office 365 Migration Tool.
Creating a Secret
1. Go to Home > Entra ID > App registrations > All applications
2. Select your newly created application.
3. Go to Certificates & secrets > Client secrets.
4. Select + New client secret.
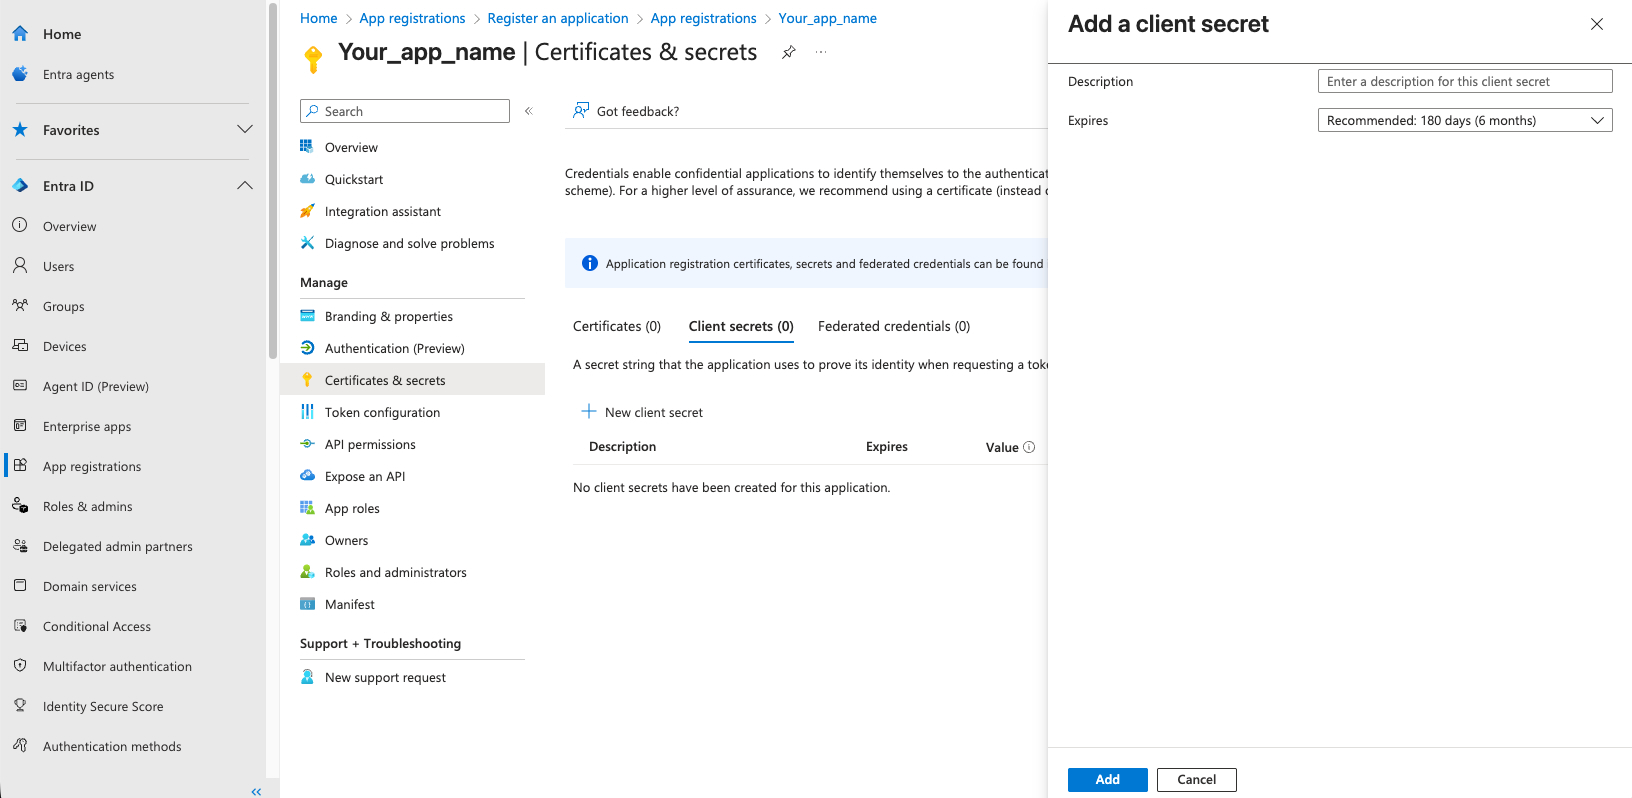
5. In Add a client secret, complete the Description field and select the Expiration period.
6. Confirm with Add.
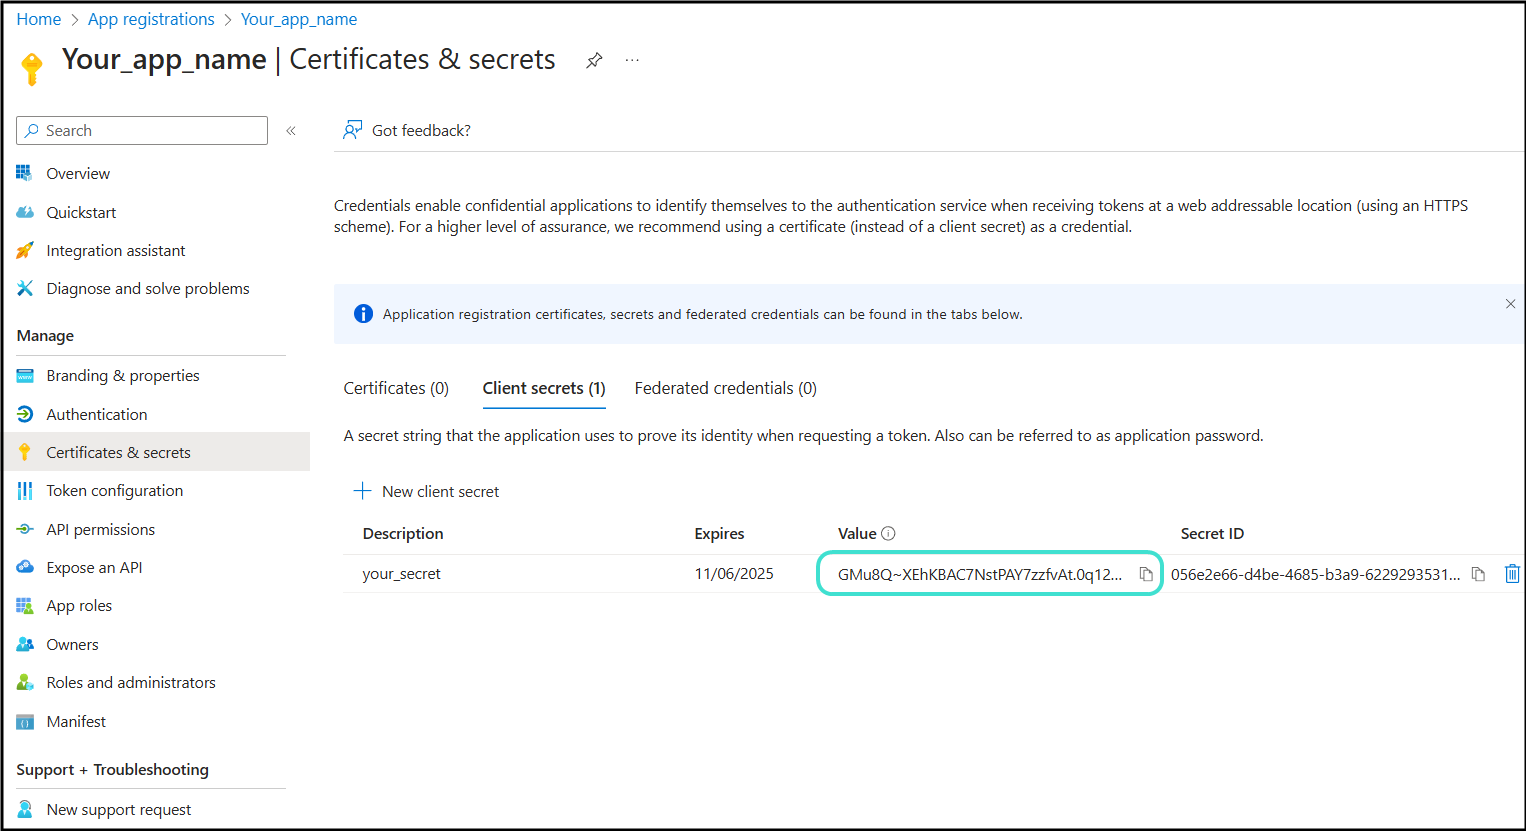
7. Copy the secret Value and paste it to the Microsoft 365 Migration Tool.
Enabling the API permissions
1. Go to Home > Entra ID > App registrations > All applications
2. Select your newly created application.
3. Go to API permissions.
4. Select Microsoft Graph.
5. Select Application permissions.
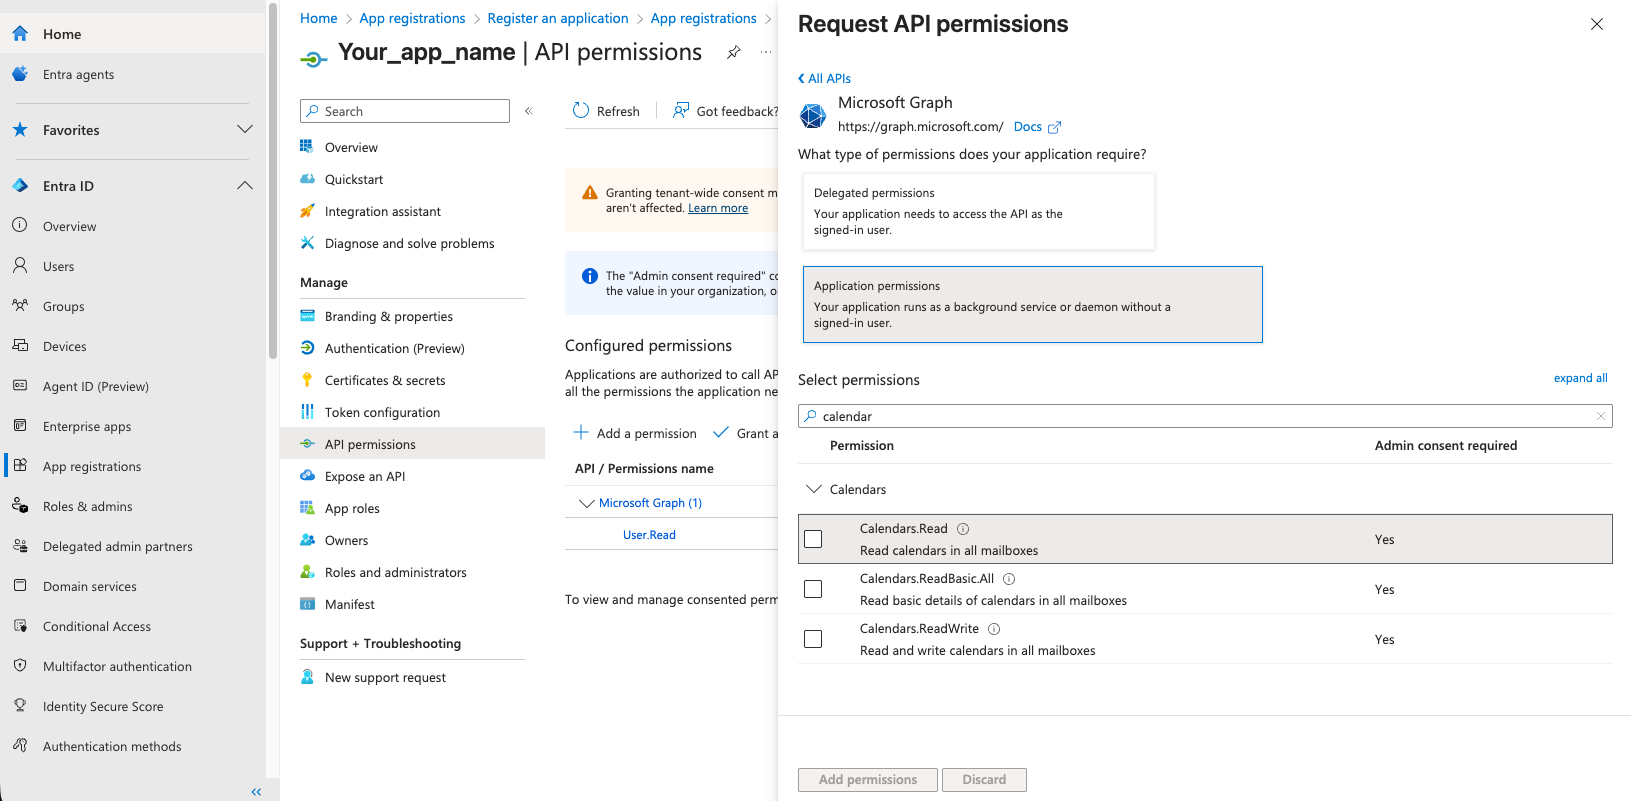
6. Select all permissions listed in the Microsoft 365 Migration Tool main screen.
-
Calendars.Read
-
Contacts.Read
-
Domain.Read.All
-
Files.Read.All
-
Group.Read.All
-
Mail.Read
-
User.Read
-
User.Read.All
7. Confirm with Add permissions.
8. Grant admin consent.

What to keep in mind?
The M365 Migration Tool transfers the entire user database. It is not possible to select individual users. All accounts are migrated together.
Users can continue working on the M365 server during the migration, without any interruption.
All data is safely transferred and fully protected throughout the migration process.
The migration can be run from any IceWarp server that has an internet connection.
Once started, the migration process runs on its own. No need to supervise it.
You do not need to manually create email accounts or domains in IceWarp before the migration, because the migration tool will do it for you automatically.
-
If a user exists in Microsoft 365 but not in IceWarp, the tool will create the user and move their data over.
-
If the same user exists on both systems, the tool merges their data.
-
If the same user already has some data in IceWarp (for example, imported from a .pst file), that data might be duplicated after the migration.
For the smoothest process, we recommend letting the migration tool create everything for you – both domains and accounts.

