Miscellaneous
Find Accounts Dialog
This dialog can be used to locate accounts within your IceWarp Server.
Select Accounts > Find (or just click Ctrl + F).
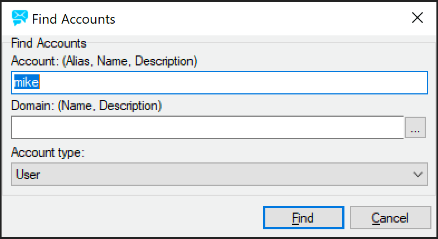
Figure. Find accounts dialog.
Note: If you want to view all domains (users, groups, ...) again, you have to press F5 . (Another way is to repeat search with searching criteria cleared.)
Status Bar
The Status bar is located at the bottom of the GUI.
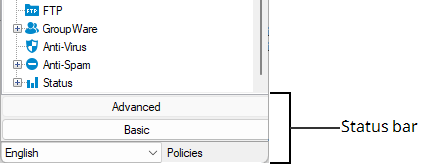
Figure. Status bar.
Note: Information about a server version is placed above the Main Menu bar.
Languages
IceWarp Server is in English by default but it can be localized to other languages by loading a language xml file.
Various language files are available but you can also write your own if you wish.
The language file to be used at start can be specified in file info.xml or you can switch between languages using the language list (see above). It will expand to show all available language files. Select one and the interface will immediately start to use that language.
The language XML files have to be located in the <install_dir>/xml/lang/<language_abbreviation> folder and each XML file should have a language identification tag as the first line.
For example: the Portuguese language file is called data.xml, is placed in the <install_dir>/xml/lang/pt directory, contains the console translation and should look like this:
Node Tree Search
This search feature allows you to filter Administration console nodes and subnodes.

Figure. Node tree search.
Write the desired term or its part into the Search field (at the top of the tree panel). Nodes and subnodes are filtered immediately. To reveal all nodes, just clear the Search field.
Note: Search keywords are used for each node/tab. i.e.: it is
not necessary the appropriate tab (in GUI) includes exact expression you
have searched.
If some node is found, all its subnodes are shown too.
Copy Button
On the various places in GUI, you can find the Copy button. It is used on places where you add multiple items (together with the Add, Edit and Delete buttons).

Figure. Ribbon with the copy button.
This button copies the currently selected item and presents the Add dialog with the items values. This lets you easily duplicate and alter any item in the GUI, no matter if it is a SIP gateway rule, Web service or a simple SSL tunnel item. You do not need to use the copy & paste feature anymore.
Account Colors
User account are distinguished by icon colors:
![]()
Figure. Account type highlights.

