How to Synchronize FileSync
-
Start FileSync, enter your IceWarp account credentials and sign in.
-
Once signing in is successful, you can synchronize your files:
-
Check All shared folders to synchronize all the folders, including shared with you
-
Check Select folders to select the particular folders to synchronize
-
Check Only my folders to synchronize files only from your folders
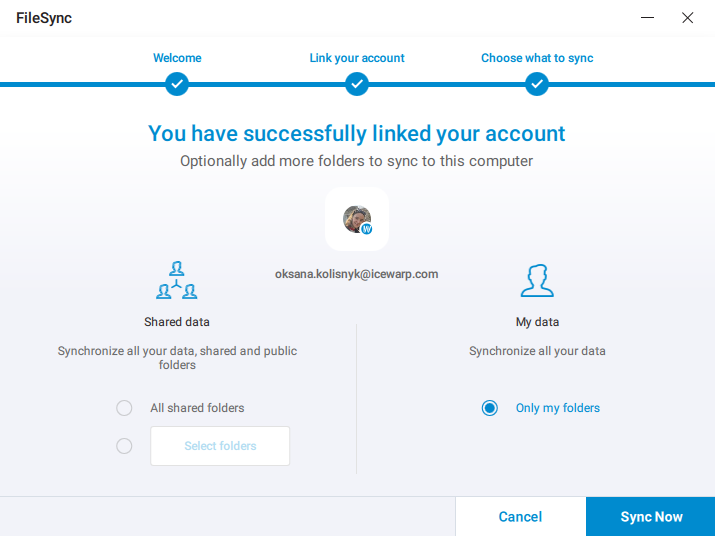
Figure. Synchronizing files.
-
-
Click Sync Now to start synchronization.
-
To monitor the process, click

 to expand the system tray menu and the
  FileSync icon
  to open the operations dialog. In the dialog, you can see the list of synchronized files, pause synchronization process, log out from your account, open support webpage and manage your Preferences.
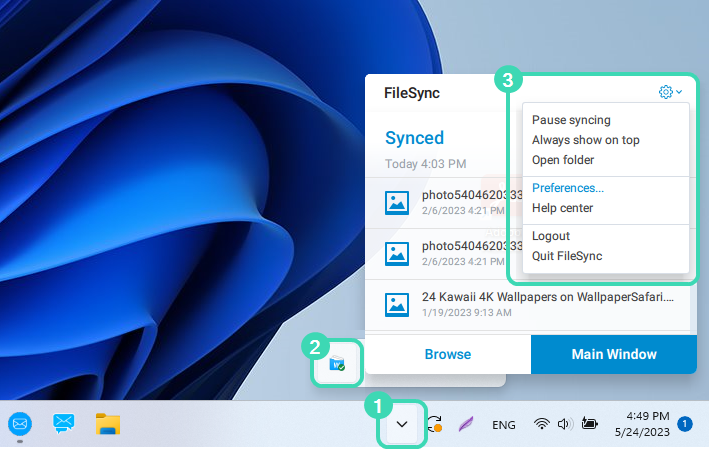
Figure. Operations dialog.
-
To manage your preferences, click the Settings icon
 > Preferences.
 In Preferences you can:
-
See the folder tree
-
Change language and storage folder
-
Set up a virtual drive
-
Select what folders to synchronize
-
Manage notifications
-
Enable opening FileSync on computer startup

Figure. Preferences.
-
-
The folder tree structure
 inherits the folder tree structure of your WebClient.
 -
The folder IceWarp Desktop Client Attachments is created by FileSync automatically once you send the smart attachment (see How to send smart attachments).
Note: For security reasons, you can synchronize only files in your storage folder. Therefore, it is not possible to synchronize, for example, entire Desktop folder. Once you select a storage folder, FileSync automatically creates an additional folder with the name IceWarp.

