Text formatting
Insert your text
You can add a new text in three different ways:
-
Add a text passage within the corresponding text placeholder on the slide layout. To do that, just put the cursor within the placeholder and type in your text or paste it using the Ctrl+V key combination instead of the default text.
-
Add a text passage anywhere on a slide. You can insert a text box (a rectangular frame that allows you to enter some text within it) or a Text Art object (a text box with a predefined font style and color that allows you to apply some text effects). Depending on the necessary text object type, you can do the following:
-
to add a text box, click the
 Text Box icon on the Home or Insert tab of the top toolbar, then click where you want to insert the text box, hold the mouse button and drag the text box border to specify its size. When you release the mouse button, the insertion point will appear in the added text box, allowing you to enter your text.
Note: It's also possible to insert a text box by clicking the
 Shape icon on the top toolbar and selecting the
  shape from the Basic Shapes group.
 -
to add a Text Art object, click the
 Text Art icon on the Insert tab of the top toolbar, then click on the desired style template – the Text Art object will be added in the center of the slide. Select the default text within the text box with the mouse and replace it with your own text.
-
-
Add a text passage within an autoshape. Select a shape and start typing your text.
Click outside of the text object to apply the changes and return to the slide.
The text within the text object is a part of the latter (when you move or rotate the text object, the text moves or rotates with it).
As an inserted text object represents a rectangular frame (it has invisible text box borders by default) with text in it and this frame is a common autoshape, you can change both the shape and text properties.
To delete the added text object, click on the text box border and press the Delete key. The text within the text box will also be deleted.
Format a text box
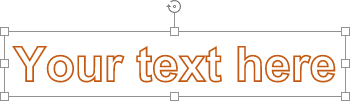
Select the text box by clicking on its border to change its properties. When the text box is selected, its borders are displayed as solid (not dashed) lines.
-
to resize, move, rotate the text box, use the special handles on the edges of the shape.
-
to edit the text box fill, stroke, replace the rectangular box with a different shape, or access the shape advanced settings, click the Shape settings
 icon on the right sidebar and use the corresponding options.
 -
to align a text box on the slide, rotate or flip it, arrange text boxes as related to other objects, right-click on the text box border and use the contextual menu options.
-
to create columns of text within the text box, right-click on the text box border, click the Shape Advanced Settings option and switch to the Columns tab in the Shape - Advanced Settings window.
Format the text within the text box
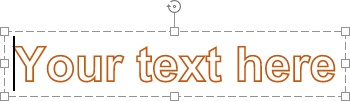
Click the text within the text box to change its properties. When the text is selected, the text box borders are displayed as dashed lines.
Note: It's also possible to change text formatting when the text box (not the text itself) is selected. In such a case, any changes will be applied to the whole text within the text box. Some font formatting options (font type, size, color and decoration styles) can be applied to the previously selected part of the text separately.
Align your text within the text box
The text is aligned horizontally in four ways: left, right, center or justified. To do that:
-
place the cursor to the position where you want the alignment to be applied (this can be a new line or already entered text),
-
dropdown the Horizontal align
 list on the Home tab of the top toolbar,
 -
select the alignment type you would like to apply:
-
the Align text left option
 allows you to line up your text on the left side of the text box (the right side remains unaligned).
 -
the Align text center option
 allows you to line up your text in the center of the text box (the right and the left sides remains unaligned).
 -
the Align text right option
 allows you to line up your text on the right side of the text box (the left side remains unaligned).
 -
the Justify option
 allows you to line up your text both on the left and on the right sides of the text box (additional spacing is added where necessary to keep the alignment).
-
Note: These parameters can also be found in the Paragraph - Advanced Settings window.
The text is aligned vertically in three ways: top, middle or bottom. To do that:
-
place the cursor to the position where you want the alignment to be applied (this can be a new line or already entered text),
-
dropdown the Vertical align
 list on the Home tab of the top toolbar,
 -
select the alignment type you would like to apply:
-
the Align text to the top option
 allows you to line up your text to the top of the text box.
 -
the Align text to the middle option
 allows you to line up your text in the center of the text box.
 -
the Align text to the bottom option
 allows you to line up your text to the bottom of the text box.
-
Change the text direction
To Rotate the text within the text box, right-click the text, select the Text Direction option and then choose one of the available options: Horizontal (selected by default), Rotate Text Down (used to set a vertical direction, from top to bottom) or Rotate Text Up (used to set a vertical direction, from bottom to top).
Adjust font type, size, color and apply decoration styles
You can select the font type, its size and color as well as apply various font decoration styles using the corresponding icons situated on the Home tab of the top toolbar.
Note: In case you want to apply the formatting to the text already present in the presentation, select it with the mouse or using the keyboard and apply the formatting.
|
Function |
Icon |
Description |
|---|---|---|
|
Font |
|
Used to select one of the fonts from the list of the available ones. If the required font is not available in the list, you can download and install it on your operating system, and the font will be available for use in the desktop version. |
|
Font size |
|
Used to choose from the preset font size values in the drop-down list (the default values are: 8, 9, 10, 11, 12, 14, 16, 18, 20, 22, 24, 26, 28, 36, 48, 72 and 96). It's also possible to manually enter a custom value up to 300 pt in the font size field. Press Enter to confirm. |
|
Increment font size |
|
Used to change the font size making it one point bigger each time the button is pressed. |
|
Decrement font size |
|
Used to change the font size making it one point smaller each time the button is pressed. |
|
Font color |
|
Used to change the color of the letters/characters in the text. Click the downward arrow next to the icon to select the color. |
|
Bold |
|
Used to make the font bold giving it a heavier appearance. |
|
Italic |
|
Used to make the font slightly slanted to the right. |
|
Underline |
|
Used to make the text underlined with a line going under the letters. |
|
Strikeout |
|
Used to make the text struck out with a line going through the letters. |
|
Superscript |
|
Used to make the text smaller placing it in the upper part of the text line, e.g. as in fractions. |
|
Subscript |
|
Used to make the text smaller placing it in the lower part of the text line, e.g. as in chemical formulas. |


Set line spacing and change paragraph indents
You can set the line height for the text lines within the paragraph as well as the margins between the current and the previous or the following paragraph.
To do that,
-
put the cursor within the required paragraph or select several paragraphs with the mouse,
-
use the corresponding fields of the
 Text settings tab on the right sidebar to achieve the desired results:
-
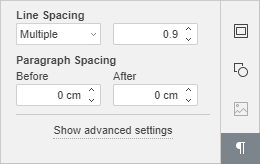
Line Spacing: set the line height for the text lines within the paragraph. You can select among three options: at least (sets the minimum line spacing that is needed to fit the largest font or graphic on the line), multiple (sets line spacing that can be expressed in numbers greater than 1), exactly (sets fixed line spacing). You can specify the necessary value in the field on the right.
-
Paragraph Spacing: set the amount of space between paragraphs.
-
Before: set the amount of space before the paragraph.
-
After: set the amount of space after the paragraph.
-
Note: These parameters can also be found in the Paragraph - Advanced Settings window.
To quickly change the current paragraph line spacing, you can also use the
 Line spacing icon on the Home tab of the top toolbar selecting the required value from the list: 1.0, 1.15, 1.5, 2.0, 2.5, or 3.0 lines.
To change the paragraph offset from the left side of the text box, put the cursor within the required paragraph, or select several paragraphs with the mouse and use the respective icons on the Home tab of the top toolbar:
 Decrease indent and Increase indent
  .
. -
Adjust paragraph advanced settings
To open the Paragraph - Advanced Settings window, right-click the text and choose the Text Advanced Settings option from the menu. It's also possible to put the cursor within the required paragraph - the Text settings tab will be activated on the right sidebar. Press the Show advanced settings link. The paragraph properties window will be opened:
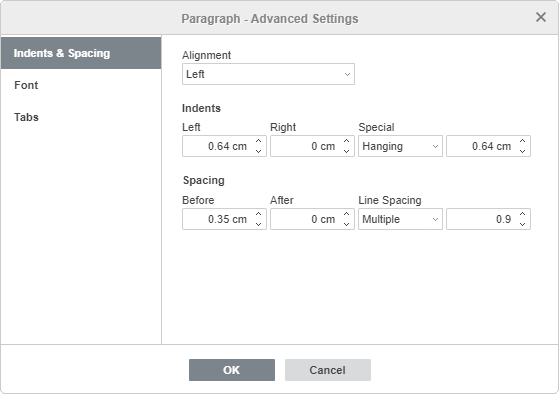
The Indents & Spacing tab allows you to:
-
change the alignment type for the paragraph text,
-
change the paragraph indents as related to internal margins of the text box,
-
Left: set the paragraph offset from the left internal margin of the text box specifying the necessary numeric value,
-
Right: set the paragraph offset from the right internal margin of the text box specifying the necessary numeric value,
-
Special: set an indent for the first line of the paragraph: select the corresponding menu item ((none), First line, Hanging) and change the default numeric value specified for First Line or Hanging,
-
-
change the paragraph line spacing.
You can also use the horizontal ruler to set indents.

Select the necessary paragraph(s) and drag the indent markers along the ruler.
-
First Line Indent marker
 is used to set the offset from the left internal margin of the text box for the first line of the paragraph.
 -
Hanging Indent marker
 is used to set the offset from the left internal margin of the text box for the second and all the subsequent lines of the paragraph.
 -
Left Indent marker
 is used to set the entire paragraph offset from the left internal margin of the text box.
 -
Right Indent marker
 is used to set the paragraph offset from the right internal margin of the text box.
Note: If you don't see the rulers, switch to the Home tab of the top toolbar, click the View settings icon at the upper right corner and uncheck the Hide Rulers option to display them.

The Font tab contains the following parameters:
-
Strikethrough is used to make the text struck out with a line going through the letters.
-
Double strikethrough is used to make the text struck out with a double line going through the letters.
-
Superscript is used to make the text smaller placing it in the upper part of the text line, e.g. as in fractions.
-
Subscript is used to make the text smaller placing it in the lower part of the text line, e.g. as in chemical formulas.
-
Small caps is used to make all letters lower case.
-
All caps is used to make all letters upper case.
-
Character Spacing is used to set the space between the characters. Increase the default value to apply the Expanded spacing, or decrease the default value to apply the Condensed spacing. Use the arrow buttons or enter the necessary value in the box.
All the changes will be displayed in the preview field below.
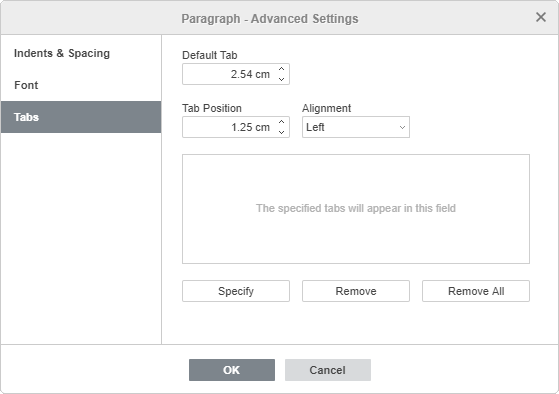
The Tab tab allows you to change tab stops i.e. the position the cursor advances to when you press the Tab key.
-
Default Tab is set at 2.54 cm. You can decrease or increase this value using the arrow buttons or enter the necessary one in the box.
-
Tab Position: is used to set custom tab stops. Enter the necessary value in this box, adjust it more precisely using the arrow buttons and press the Specify button. Your custom tab position will be added to the list in the field below.
-
Alignment: is used to set the necessary alignment type for each of the tab positions in the list above. Select the necessary tab position in the list, choose the Left, Center or Right option from the Alignment drop-down list and press the Specify button.
-
Left: lines up your text on the left side at the tab stop position; the text moves to the right from the tab stop as you type. Such a tab stop will be indicated on the horizontal ruler by the
 marker.
 -
Center: centers the text at the tab stop position. Such a tab stop will be indicated on the horizontal ruler by the
 marker.
 -
Right: lines up your text on the right side at the tab stop position; the text moves to the left from the tab stop as you type. Such a tab stop will be indicated on the horizontal ruler by the
 marker.
-
To delete tab stops from the list, select a tab stop and press the Remove or Remove All button.
To set tab stops, you can also use the horizontal ruler:
-
Click the tab selector button
 in the upper left corner of the working area to choose the necessary tab stop type: Left , Center
  , Right
  .
. -
Click on the bottom edge of the ruler where you want to place the tab stop. Drag it along the ruler to change its position. To remove the added tab stop, drag it out of the ruler.

Note: If you don't see the rulers, switch to the Home tab of the top toolbar, click the  View settings icon at the upper right corner and uncheck the Hide Rulers option to display them.
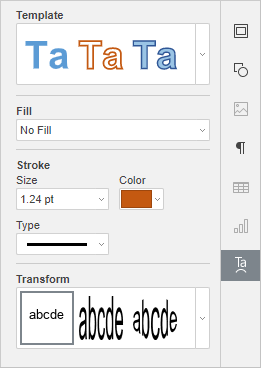
Edit a Text Art style
Select a text object and click the Text Art settings  icon on the right sidebar.
-
Change the applied text style selecting a new Template from the gallery. You can also change the basic style additionally by selecting a different font type, size etc.
-
Change the font fill and stroke. The available options are the same as the ones for autoshapes.
-
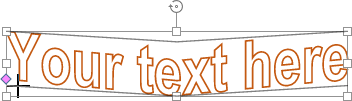
Apply a text effect by selecting the necessary text transformation type from the Transform gallery. You can adjust the degree of the text distortion by dragging the pink diamond-shaped handle.