Insert autoshapes
Insert an autoshape
To add an autoshape to your document,
-
switch to the Insert tab of the top toolbar,
-
click the
 Shape icon on the top toolbar,
 -
select one of the available autoshape groups: basic shapes, figured arrows, math, charts, stars & ribbons, callouts, buttons, rectangles, lines,
-
click the necessary autoshape within the selected group,
-
place the mouse cursor where the shape should be added,
-
once the autoshape is added, you can change its size, position and properties.
Note: To add a caption to an autoshape, make sure the required shape is selected on the page and start typing your text. The added text becomes a part of the autoshape (when you move or rotate the shape, the text moves or rotates with it).
It's also possible to add a caption to the autoshape.
Move and resize autoshapes
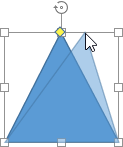
To change the autoshape size, drag small squares situated on the shape edges. To maintain the original proportions of the selected autoshape while resizing, hold down the Shift key and drag one of the corner icons.
When modifying some shapes, for example figured arrows or callouts, the yellow diamond-shaped icon is also available. It allows you to adjust some aspects of the shape, for example, the length of the head of an arrow.
To alter the autoshape position, use the  icon that appears after hovering your mouse cursor over the autoshape. Drag the autoshape to the required position without releasing the mouse button. When you move the autoshape, the guide lines are displayed to help you precisely position the object on the page (if the selected wrapping style is not inline). To move the autoshape by one-pixel increments, hold down the Ctrl key and use the keybord arrows. To move the autoshape strictly horizontally/vertically and prevent it from moving in a perpendicular direction, hold down the Shift key when dragging.
To rotate the autoshape, hover the mouse cursor over the rotation handle  and drag it clockwise or counterclockwise. To constrain the rotation angle to 15 degree increments, hold down the Shift key while rotating
Adjust autoshape settings
To align and arrange autoshapes, use the right-click menu. The menu options are:
-
Cut, Copy, Paste: standard options which are used to cut or copy the selected text/object and paste the previously cut/copied text passage or object to the current cursor position.
-
Arrange: to bring the selected autoshape to foreground, send it to background, move forward or backward as well as group or ungroup shapes to perform operations with several of them at once.
-
Align: to align the shape to the left, in the center, to the right, at the top, in the middle, at the bottom.
-
Wrapping Style: to select a text wrapping style from the available ones - inline, square, tight, through, top and bottom, in front, behind - or edit the wrap boundary. The Edit Wrap Boundary option is available only if you select a wrapping style other than Inline. Drag wrap points to customize the boundary. To create a new wrap point, click anywhere on the red line and drag it to the necessary position.

-
Rotate: to rotate the shape by 90 degrees clockwise or counterclockwise as well as to flip the shape horizontally or vertically.
-
Shape Advanced Settings: to open the 'Shape - Advanced Settings' window.
Some of the autoshape settings can be altered using the Shape settings tab of the right sidebar. To activate it click the shape and choose the Shape settings  icon on the right. Here you can change the following properties:
-
Fill: use this section to select the autoshape fill. You can choose the following options:
-
Color Fill: select this option to specify the solid color to fill the inner space of the selected autoshape.
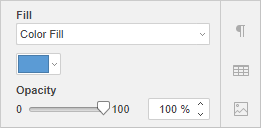
Click the colored box below and select the necessary color from the available color sets or specify any color you like:
-
Gradient Fill: use this option to fill the shape with two or more fading colors. Customize your gradient fill with no constraints. Click the Shape settings
 icon to open the Fill menu on the right sidebar:
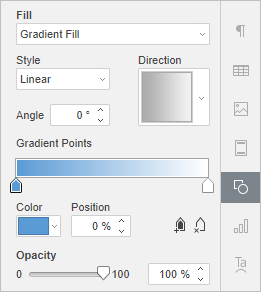
Available menu options:
-
-
Style: choose between Linear or Radial:
-
Linear: when you need your colors to flow from left-to-right, top-to-bottom, or at any angle you chose in a single direction. Click Direction to choose a preset direction and click Angle for a precise gradient angle.
-
Radial: to move from the center as it starts at a single point and emanates outward.
-
-
Gradient Point is a specific point for transition from one color to another.
-
Use the
 Add Gradient Point button or slider bar to add a gradient point. You can add up to 10 gradient points. Each next gradient point added will in no way affect the current gradient fill appearance. Use the
  Remove Gradient Point button to delete a certain gradient point.
 -
Use the slider bar to change the location of the gradient point or specify Position in percentage for precise location.
-
To apply a color to a gradient point, click a point on the slider bar, and then click Color to choose the color you want.
-
-
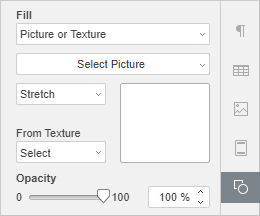
Picture or Texture: select this option to use an image or a predefined texture as the shape background.
-
If you wish to use an image as a background for the shape, you can add an image From File by selecting it on your computer hard disc drive, From URL by inserting the appropriate URL address into the opened window, or From Storage by selecting the required image stored on your portal.
-
If you wish to use a texture as a background for the shape, open the From Texture menu and select the necessary texture preset.
Currently, the following textures are available: canvas, carton, dark fabric, grain, granite, grey paper, knit, leather, brown paper, papyrus, wood.
-
In case the selected Picture has less or more dimensions than the autoshape has, you can choose the Stretch or Tile setting from the drop-down list.
The Stretch option allows you to adjust the image size to fit the autoshape size so that it could fill the space completely.
The Tile option allows you to display only a part of the bigger image keeping its original dimensions or repeat the smaller image keeping its original dimensions over the autoshape surface so that it could fill the space completely.
Note: Any selected Texture preset fills the space completely, but you can apply the Stretch effect if necessary.
-
-
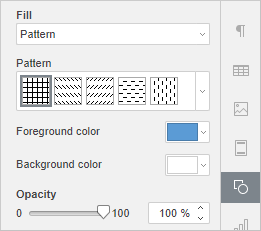
Pattern: select this option to fill the shape with a two-colored design composed of regularly repeated elements.
-
Pattern: select one of the predefined designs from the menu.
-
Foreground color: click this color box to change the color of the pattern elements.
-
Background color: click this color box to change the color of the pattern background.
-
-
No Fill: select this option if you don't want to use any fill.
-
No Fill: select this option if you don't want to use any fill.
-
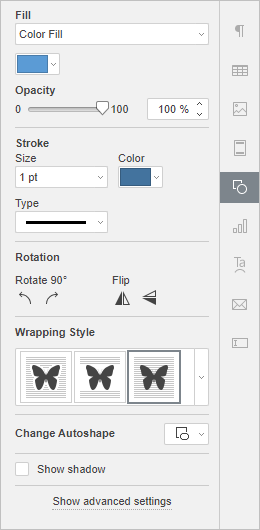
Opacity: use this section to set an Opacity level dragging the slider or entering the percent value manually. The default value is 100% . It corresponds to the full opacity. The 0% value corresponds to the full transparency.
-
Stroke: use this section to change the autoshape stroke width, color or type.
-
To change the stroke width, select one of the available options from the Size drop-down list. The available options are: 0.5 pt, 1 pt, 1.5 pt, 2.25 pt, 3 pt, 4.5 pt, 6 pt. Alternatively, select the No Line option if you don't want to use any stroke.
-
To change the stroke color , click on the colored box below and select the necessary color.
-
To change the stroke type , select the necessary option from the corresponding drop-down list (a solid line is applied by default, you can change it to one of the available dashed lines).
-
-
Rotation: to rotate the shape by 90 degrees clockwise or counterclockwise as well as to flip the shape horizontally or vertically. Click one of the buttons:
-
 to rotate the shape by 90 degrees counterclockwise
 -
 to rotate the shape by 90 degrees clockwise
 -
 to flip the shape horizontally (left to right)
 -
 to flip the shape vertically (upside down)
-
-
Wrapping Style: use this section to select a text wrapping style from the available ones - inline, square, tight, through, top and bottom, in front, behind (for more information see the advanced settings description below).
-
Change Autoshape: use this section to replace the current autoshape with another one selected from the drop-down list.
-
Show shadow: check this option to display the shape with a shadow.
Adjust autoshape advanced settings
To change the advanced settings of the autoshape, right-click it and select the Advanced Settings option in the menu or use the Show advanced settings link on the right sidebar. The 'Shape - Advanced Settings' window will open:
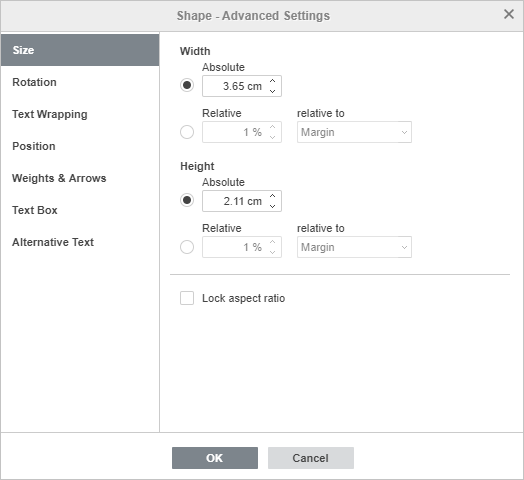
The Size tab contains the following parameters:
-
Width: use one of these options to change the autoshape width.
-
Absolute: specify an exact value measured in absolute units i.e. Centimeters/Points/Inches (depending on the option specified on the File -> Advanced Settings... tab).
-
Relative: specify a percentage relative to the left margin width, the margin (i.e. the distance between the left and right margins), the page width, or the right margin width.
-
-
Height: use one of these options to change the autoshape height.
-
Absolute: specify an exact value measured in absolute units i.e. Centimeters/Points/Inches (depending on the option specified on the File -> Advanced Settings... tab).
-
Relative: specify a percentage relative to the margin (i.e. the distance between the top and bottom margins), the bottom margin height, the page height, or the top margin height.
-
-
If the Lock aspect ratio option is checked, the width and height will be changed together preserving the original shape aspect ratio.
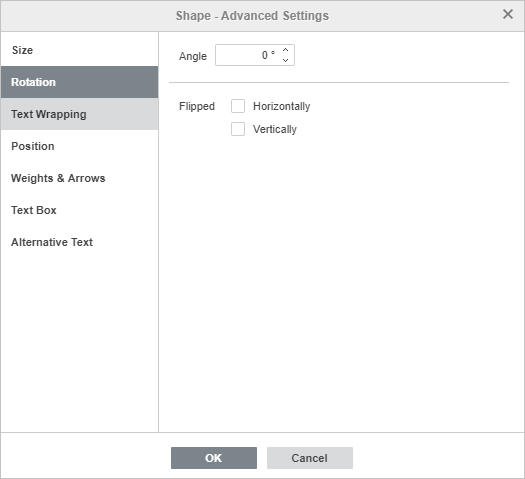
The Rotation tab contains the following parameters:
-
Angle: use this option to rotate the shape by an exactly specified angle. Enter the necessary value measured in degrees into the field or adjust it using the arrows on the right.
-
Flipped: check the Horizontally box to flip the shape horizontally (left to right) or check the Vertically box to flip the shape vertically (upside down).
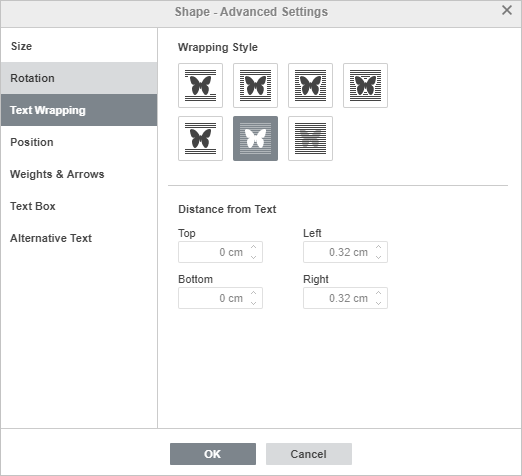
The Text Wrapping tab contains the following parameters:
-
Wrapping Style: use this option to change the way the shape is positioned relative to the text: it will either be a part of the text (in case you select the inline style) or bypassed by it from all sides (if you select one of the other styles).
-
 Inline - the shape is considered to be a part of the text, like a character, so when the text moves, the shape moves as well. In this case the positioning options are inaccessible.
 -
If one of the following styles is selected, the shape can be moved independently of the text and positioned on the page exactly:
-
 Square - the text wraps the rectangular box that bounds the shape.
 -
 Tight - the text wraps the actual shape edges.
 -
 Through - the text wraps around the shape edges and fills in the open white space within the shape. So that the effect can appear, use the Edit Wrap Boundary option from the right-click menu.
 -
 Top and bottom - the text is only above and below the shape.
 -
 In front - the shape overlaps the text.
 -
 Behind - the text overlaps the shape.
-
If you select the square, tight, through, or top and bottom styles, you will be able to set up some additional parameters - distance from text at all sides (top, bottom, left, right).
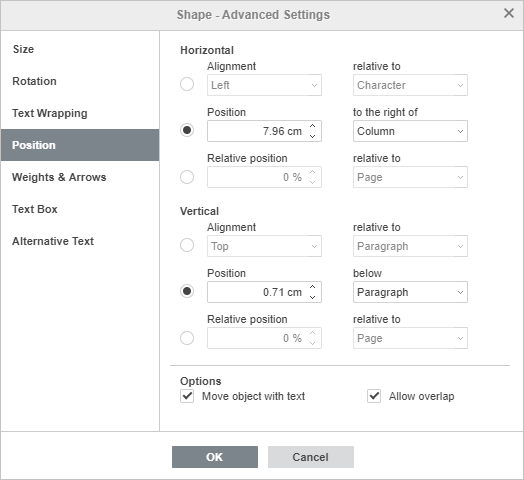
The Position tab is available only if the selected wrapping style is not inline. This tab contains the following parameters that vary depending on the selected wrapping style:
-
The Horizontal section allows you to select one of the following three autoshape positioning types:
-
Alignment (left, center, right) relative to character, column, left margin, margin, page or right margin,
-
Absolute Position measured in absolute units i.e. Centimeters/Points/Inches (depending on the option specified on the File -> Advanced Settings... tab) to the right of character, column, left margin, margin, page or right margin,
-
Relative position measured in percent relative to the left margin, margin, page or right margin.
-
-
The Vertical section allows you to select one of the following three autoshape positioning types:
-
Alignment (top, center, bottom) relative to line, margin, bottom margin, paragraph, page or top margin,
-
Absolute Position measured in absolute units i.e. Centimeters/Points/Inches (depending on the option specified on the File -> Advanced Settings... tab) below line, margin, bottom margin, paragraph, page or top margin,
-
Relative position measured in percent relative to the margin, bottom margin, page or top margin.
-
-
Move object with text ensures that the autoshape moves along with the text to which it is anchored.
-
Allow overlap makes it possible for two autoshapes to overlap if you drag them near each other on the page.
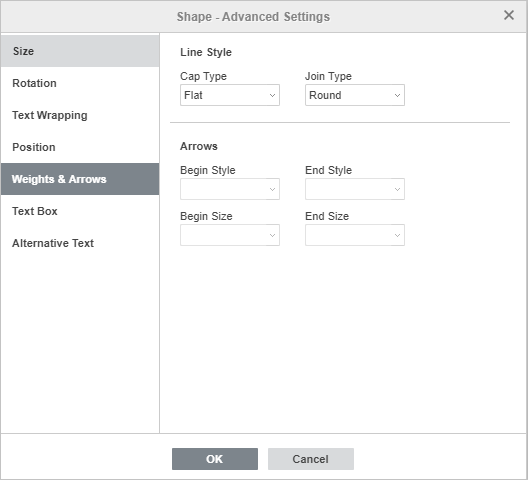
The Weights & Arrows tab contains the following parameters:
-
Line Style: this option group allows specifying the following parameters:
-
Cap Type: this option allows setting the style for the end of the line, therefore it can be applied only to the shapes with the open outline, such as lines, polylines etc.:
-
Flat: the end points will be flat.
-
Round: the end points will be rounded.
-
Square: the end points will be square.
-
-
Join Type: this option allows setting the style for the intersection of two lines, for example, it can affect a polyline or the corners of the triangle or rectangle outline
-
Round: the corner will be rounded.
-
Bevel: the corner will be cut off angularly.
-
Miter: the corner will be pointed. It goes well to shapes with sharp angles.
-
Note: The effect will be more noticeable if you use a large outline width.
-
-
Arrows: this option group is available if a shape from the Lines shape group is selected. It allows setting the arrow Start and End Style and Size by selecting the appropriate option from the drop-down lists.
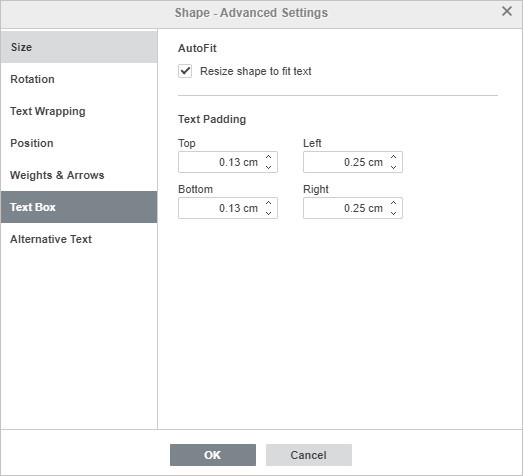
The Text Padding tab allows changing the Top, Bottom, Left and Right internal margins of the autoshape (i.e. the distance between the text within the shape and the autoshape borders).
Note: This tab is only available if text is added within the autoshape, otherwise the tab is disabled
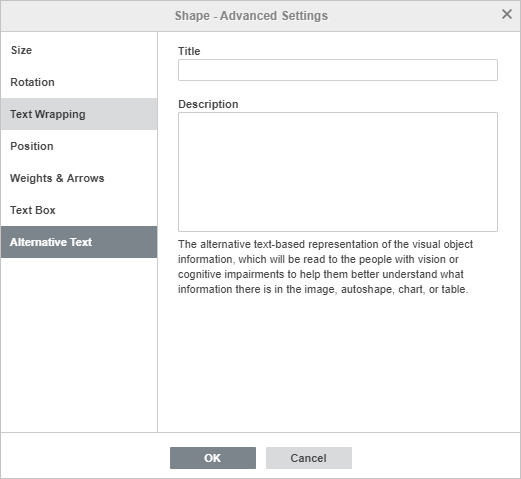
The Alternative Text tab allows specifying a Title and Description which will be read to people with vision or cognitive impairments to help them better understand what information the shape contains.

