Getting Started
First Steps
-
Download the IceWarp Desktop Suite from our download portal.
-
The IceWarp Desktop Suite setup wizard will pop up immediately after the download is finished.
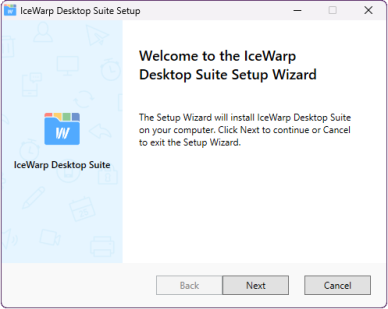
Figure. IceWarp Desktop Suite wizard.
-
Accept the License Agreement terms and click Next.
-
You can choose which parts of the suite are installed: IceWarp Desktop Client, Desktop Office, IceWarp FileSync, IceWarp TeamChat. Check the relevant checkboxes and click Next.
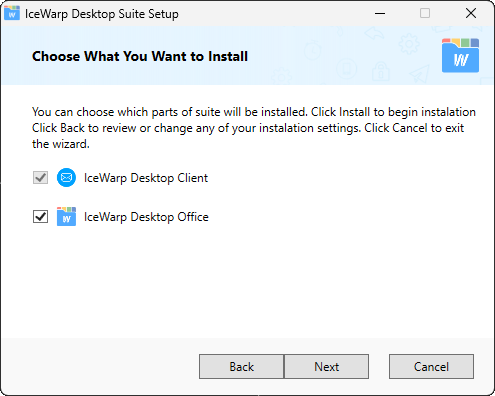
Figure. IceWarp Desktop Suite selection.
-
Select a destination folder the Desktop files.
-
After IceWarp Desktop Suite is installed, you can see the Configuration Wizard. Accept the License Agreement terms, enter your email address and password and click Next. During the configuration, you may be prompted to import and rewrite current settings.
Figure. Import settings option.
-
After the Configuration Wizard setup is finished, you can start using Desktop Suit.
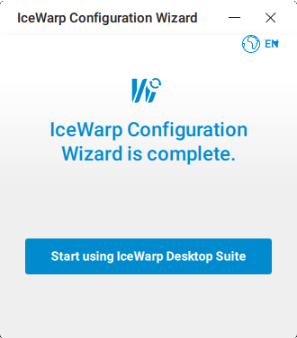
Figure. IceWarp Configuration wizard.
-
Double click the IceWarp Desktop Client icon
 .
.
Figure. Starting client dialog.
-
Select the theme of the new account interface and click Next.

Figure. Interface theme.
-
You can import your data from other applications detected on your device (e.g.: Microsoft Outlook).

Figure. Import data.
-
Select an application to import data from and click Next.
-
If you do not want to import anything, click Skip Import to setup an account manually.
Import data
In the case of importing the data from Microsoft Outlook, please notice that the data migration from IMAP4 servers are synchronized automatically, but in the event of importing data from local servers (or if you choose to import from IMAP4 server locally), you can choose from up to five types of data to import: messages, calendars, tasks, contacts, categories. If you want to skip some of these five types, click the icon and it will disappear.
Note:It is also possible to perform imports later. See Import
Setup a new account
To set up see Account setup for next steps.

